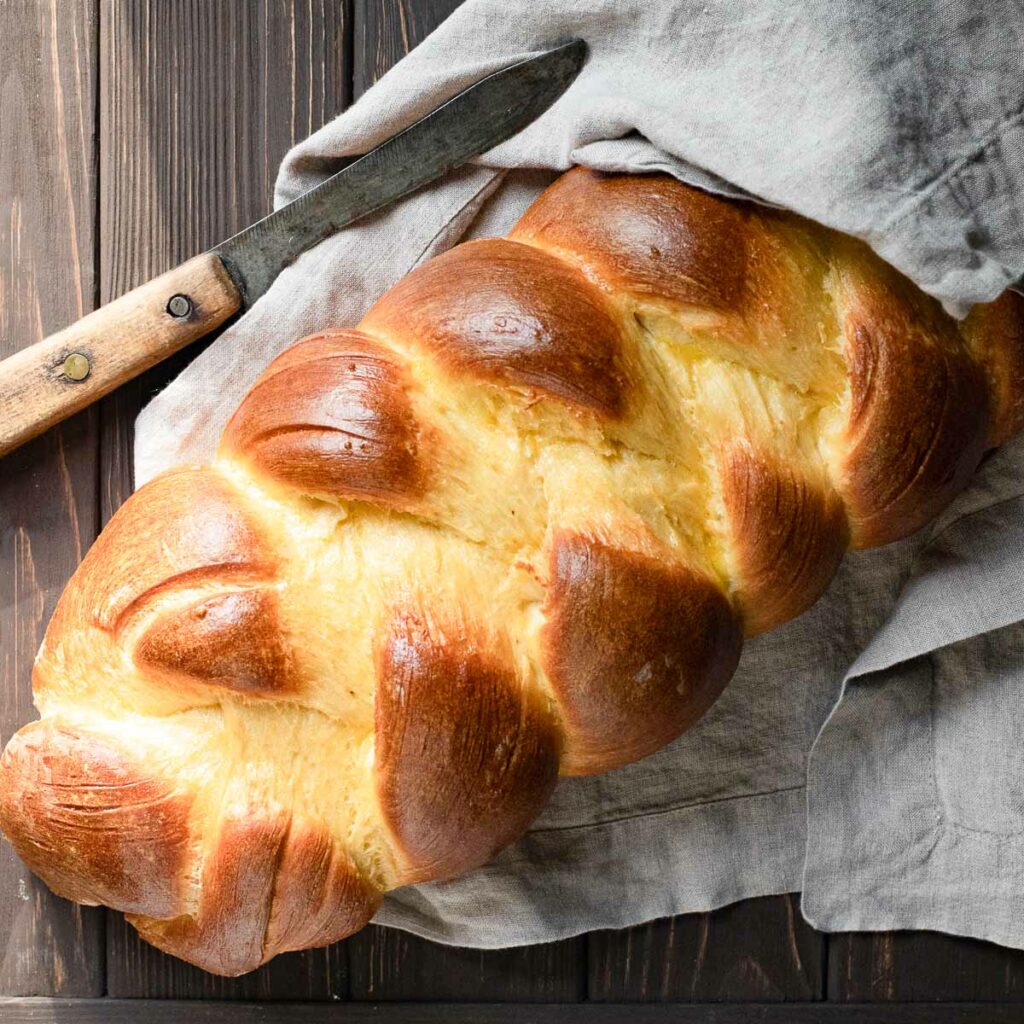
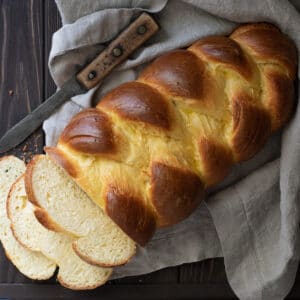
Golden brown outside, soft and slightly sweet inside, challah bread is always a treat! And there’s nothing like baking a fresh loaf of warm challah at home.

In this recipe for challah bread, I’ll show you step-by-step how to create a beautiful loaf that you’ll be proud of.
WHAT IS CHALLAH?
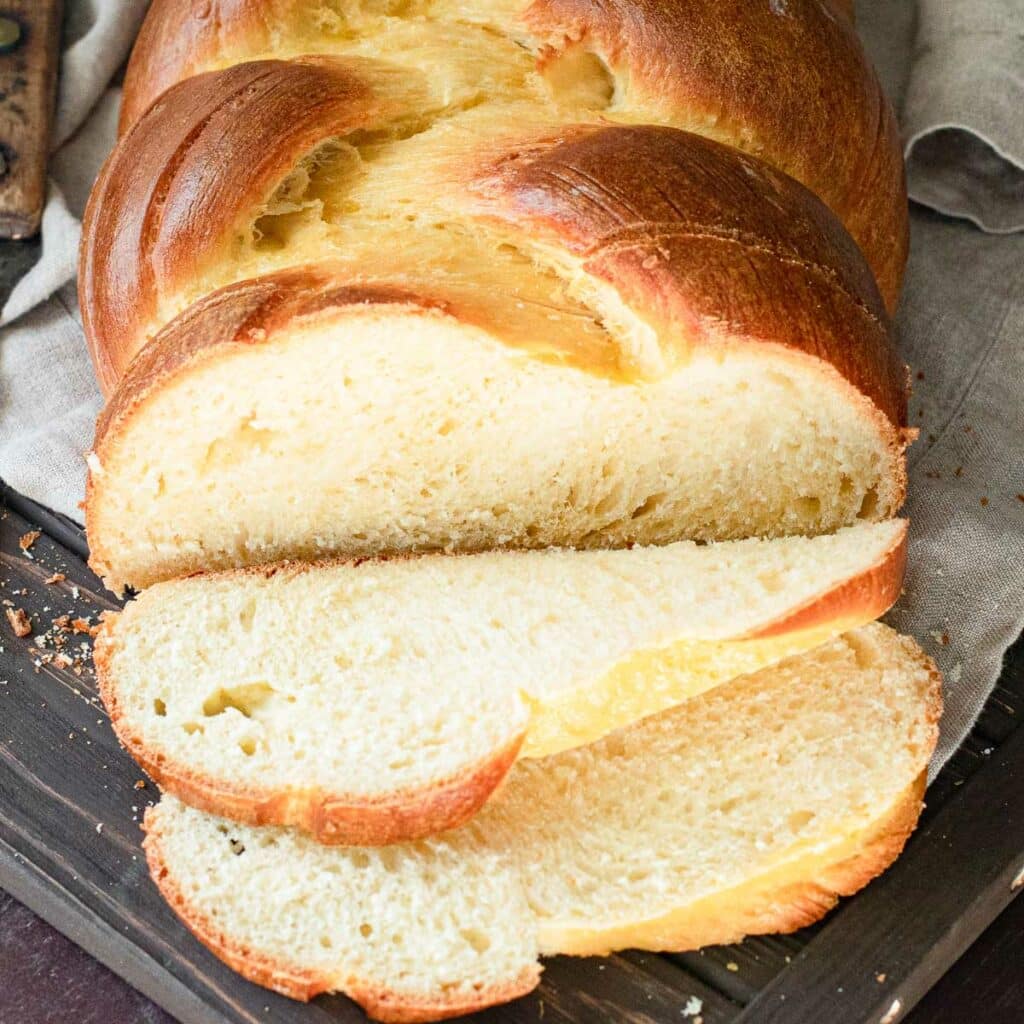
Challah is an eggy loaf of bread that has a slight sweetness to it. Soft and fluffy on the inside, it’s closest in flavor and texture to brioche bread. The dough is typically braided and, sometimes, formed into a round shape after braiding (especially around Rosh Hashanah).
Not just for major Jewish holidays, challah is enjoyed year round. For many Jews, even as frequently as weekly.

Ingredients for HOMEMADE CHALLAH BREAD
The ingredient list for this challah recipe is super simple:

HOW TO MAKE CHALLAH
Make the dough
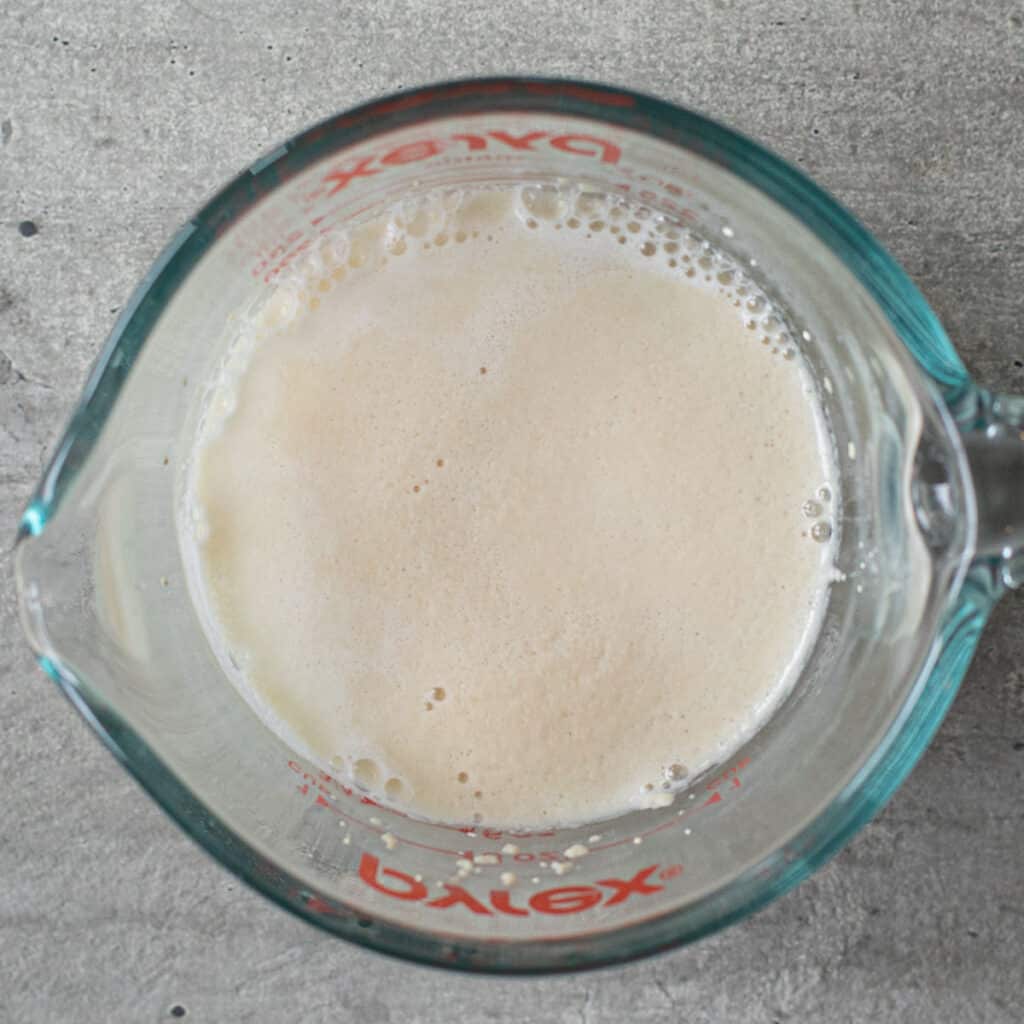
First, dissolve the yeast in warm water. The water should be almost hot, about 110-115F degrees. The water needs to be warm enough to activate the yeast, or your bread won’t rise. If you have a kitchen thermometer, now is the time to use it.
When yeast is activated, it should bubble on the surface of the water.
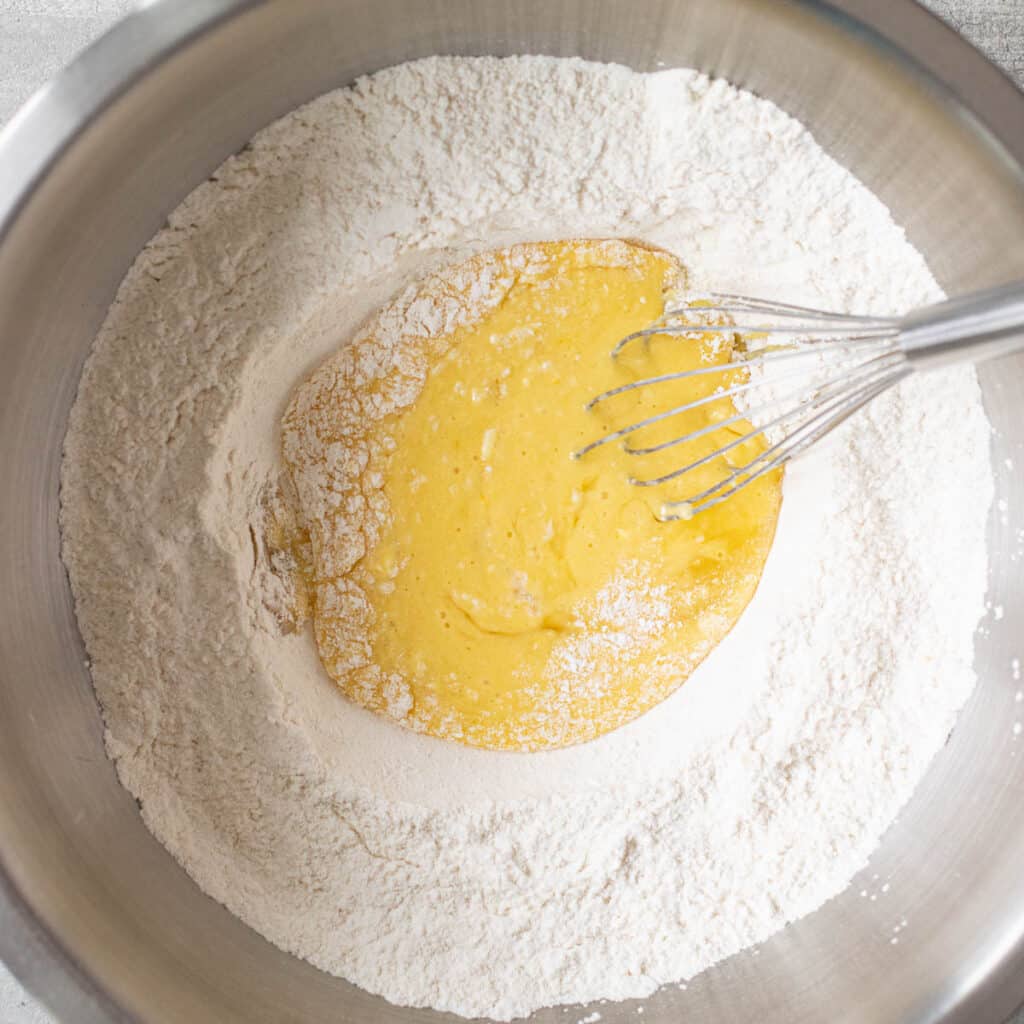
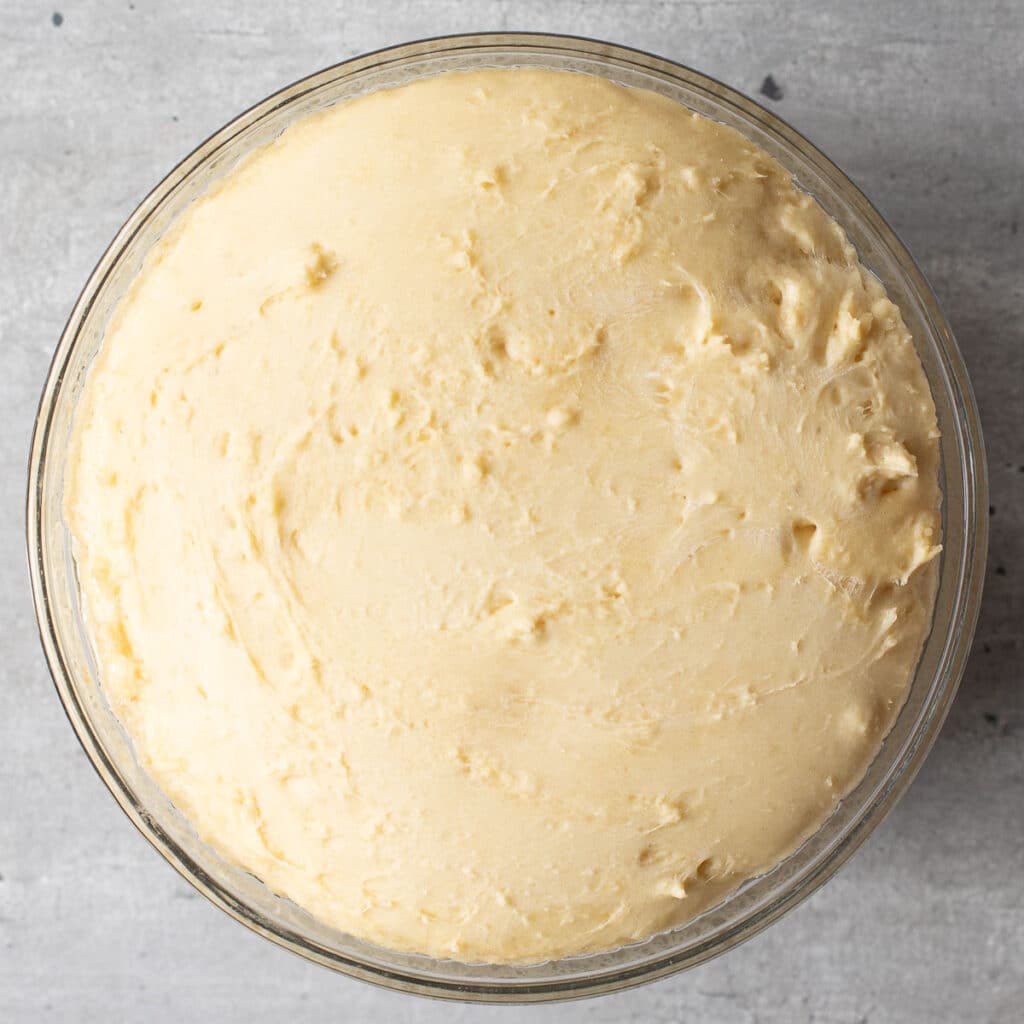
Whisk the eggs into the dry ingredients in a large bowl to form the dough. Then, add your activated yeast mixture.
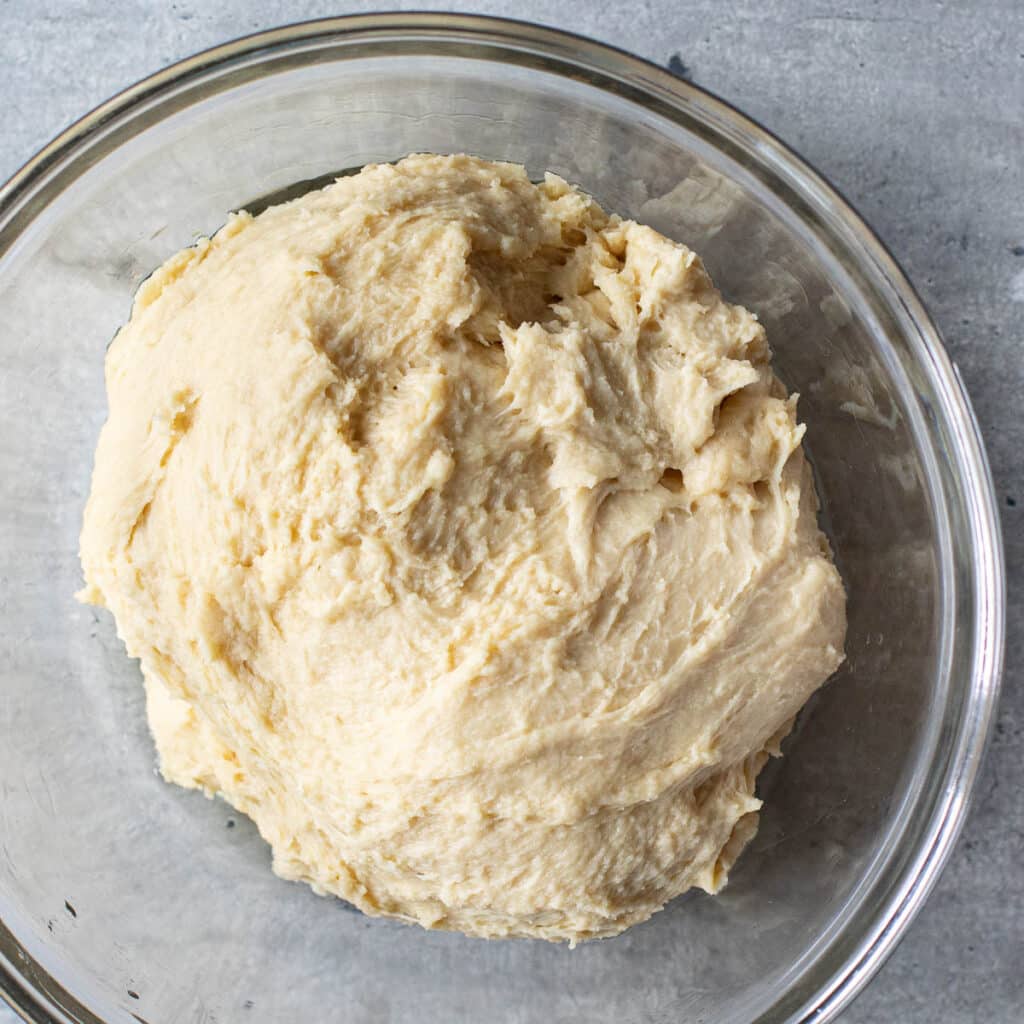
The dough will be very shaggy and dry, but don’t worry! Once you knead it, it will be super smooth and supple.
If you have a stand mixer with a dough hook attachment, you may want to use it. You’ll want to knead the dough for 8-10 minutes which, for many of us, is just too long to do by hand.
I actually love kneading by hand. I find it so therapeutic.
Do the first rise
There will be a first rise before braiding and a second rise after braiding.
Placing the dough into a warm oven is the best option for the first rise. If you put the dough into a warm oven, it will rise much faster than if you left it on the countertop.
Braid the challah
After the first rise, it’s time to braid. Don’t be intimidated! If you can braid hair, you can braid challah.
Divide the dough into three equal parts and roll each part into a long rope. Line them up next to each other and gather them together at the top.
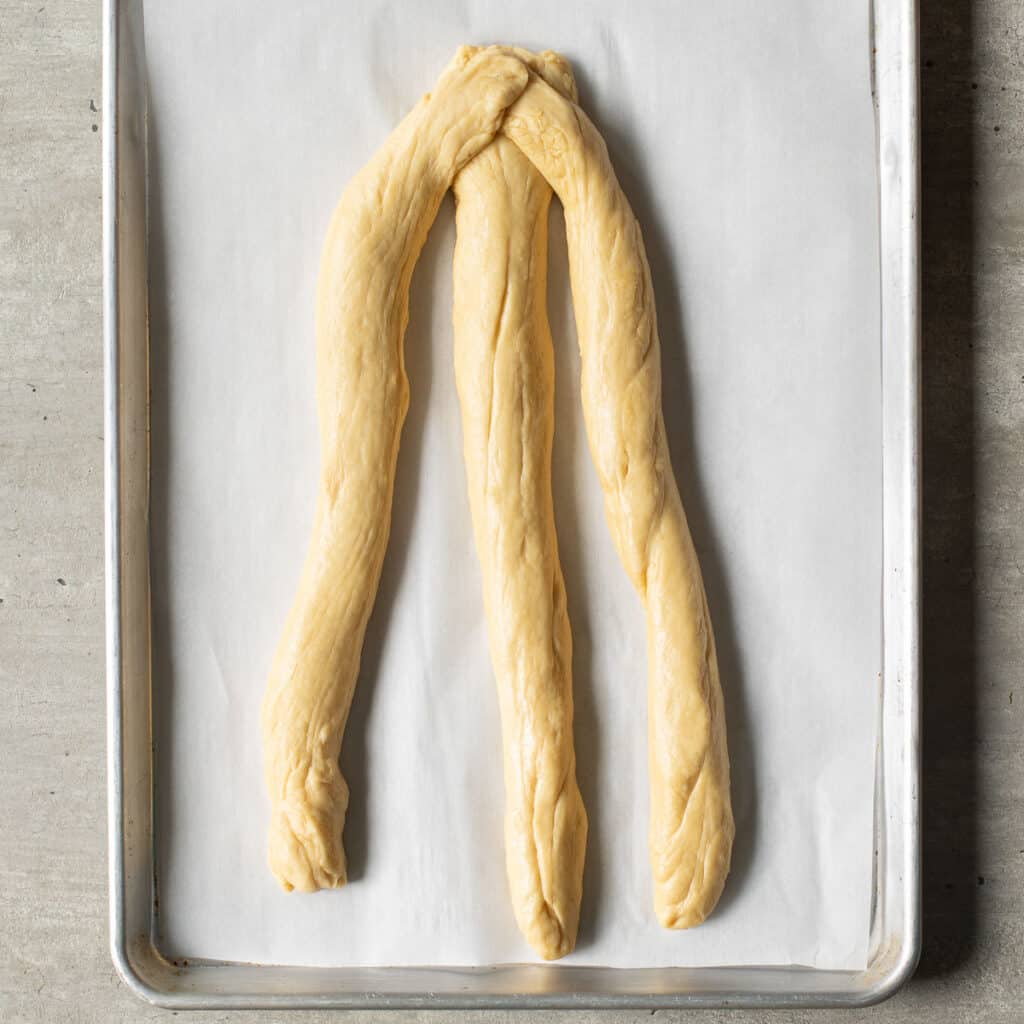
Now, cross the center rope (which should be tucked under the right side rope) over the rope to the right.
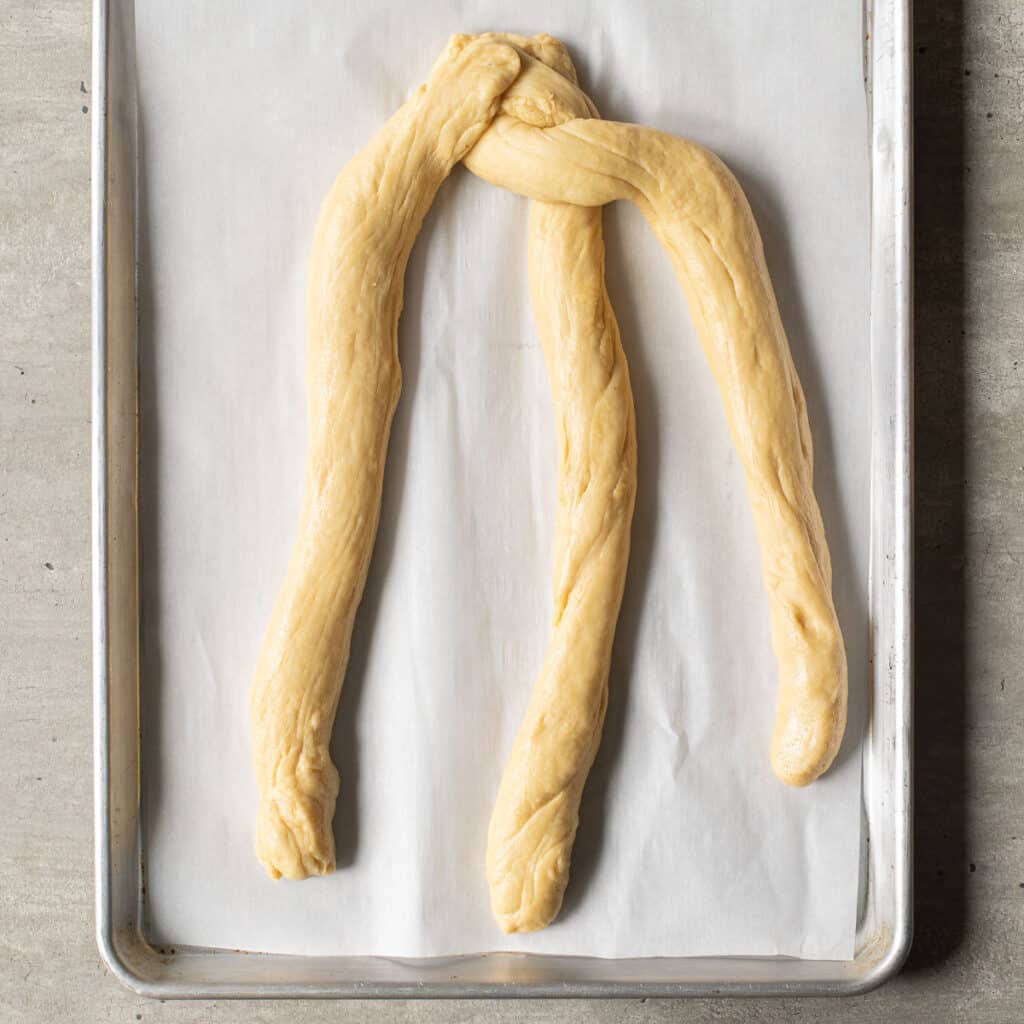
Then, take the center rope and cross it over the rope to the left.
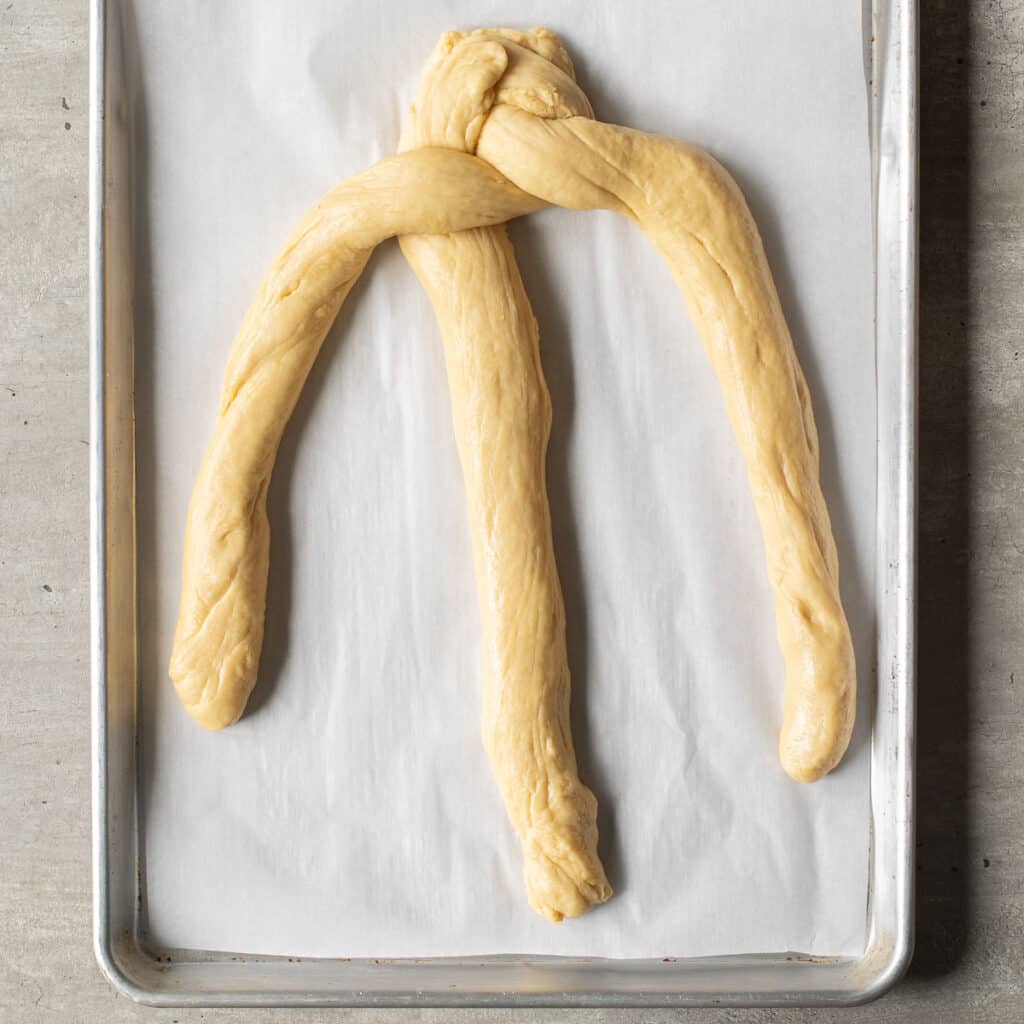
Take the center rope and cross it over the rope to the right.
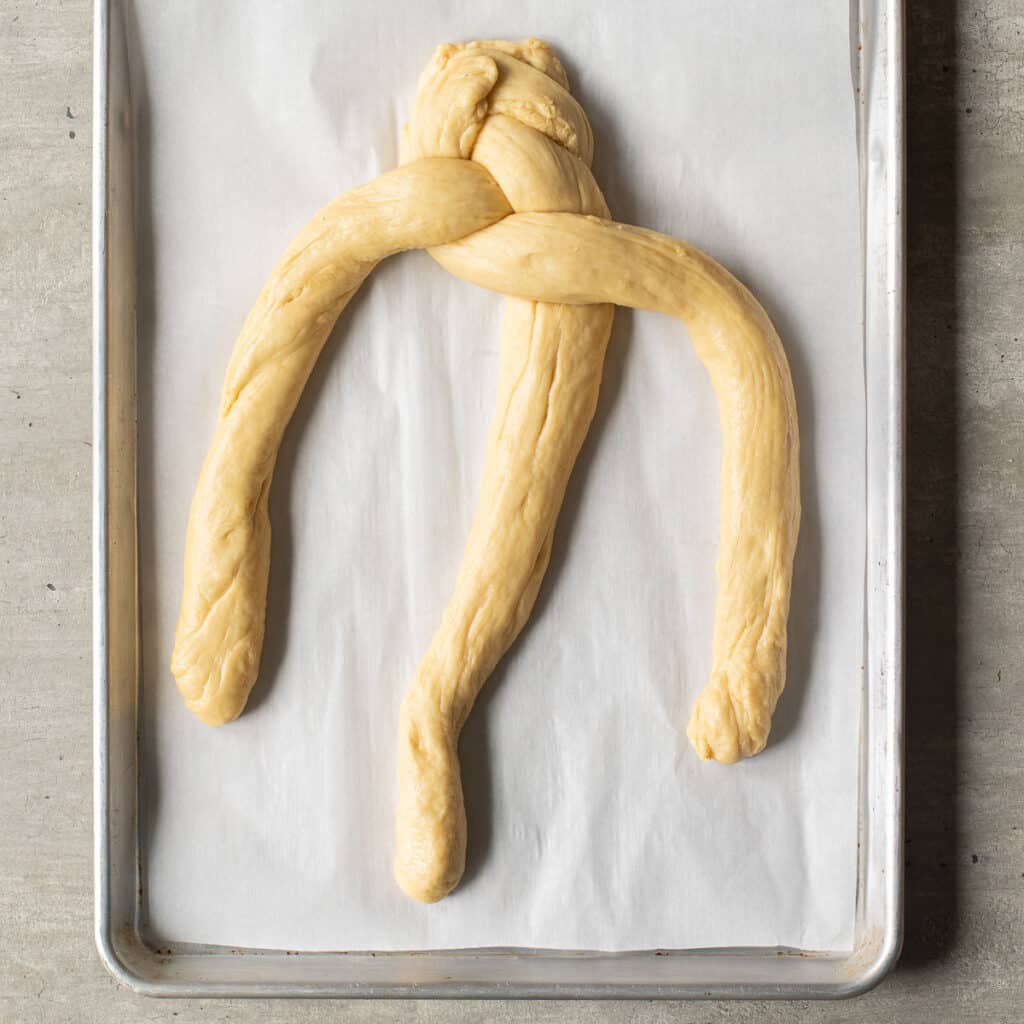
And again, take the center rope and cross it over the rope to the left.
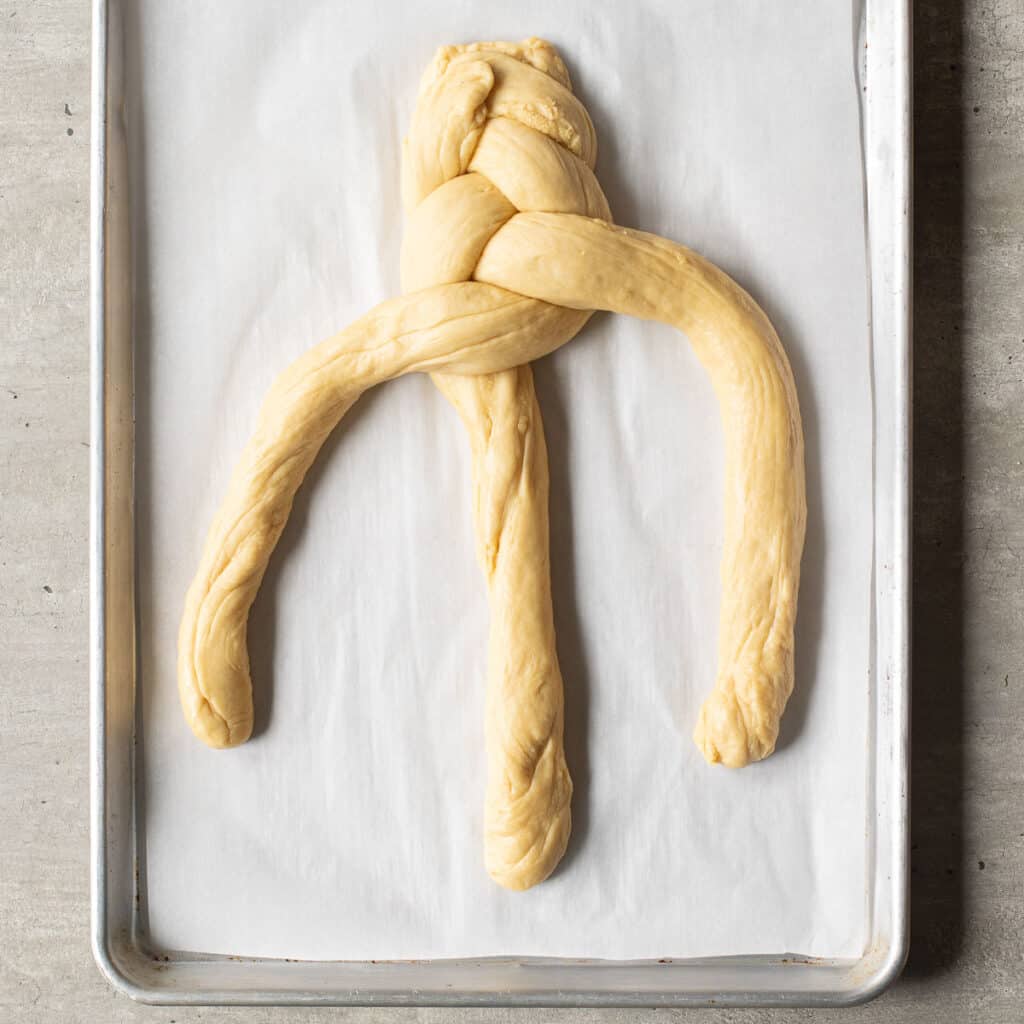
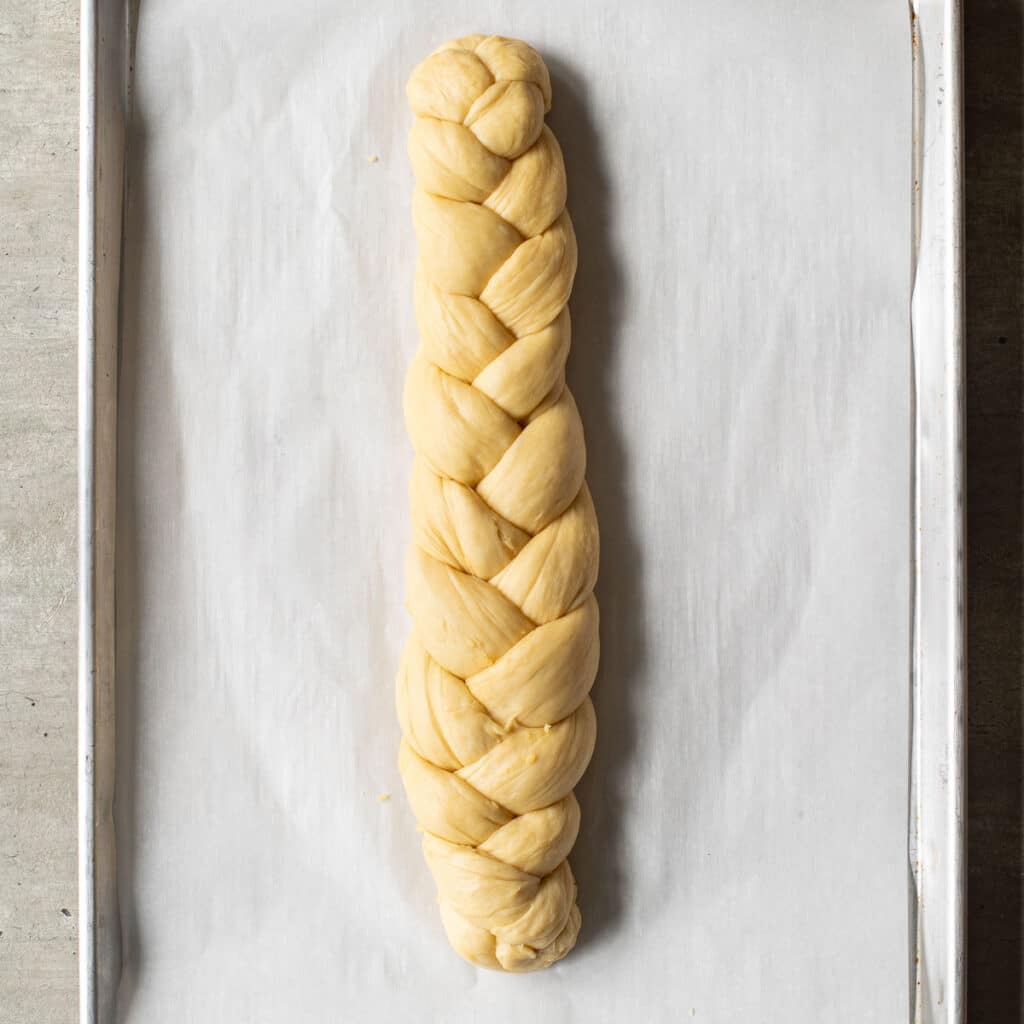
Continue to repeat, crossing the center over right, then center over left, until your dough is completely braided. Tuck the ends under.
Do the second rise
The rising time for the second rise is only 1 hour, and can be done on the counter top instead of in the oven. Just cover the braided dough with a dish towel so it won’t dry out, and let it sit. Then, you’re ready to bake!
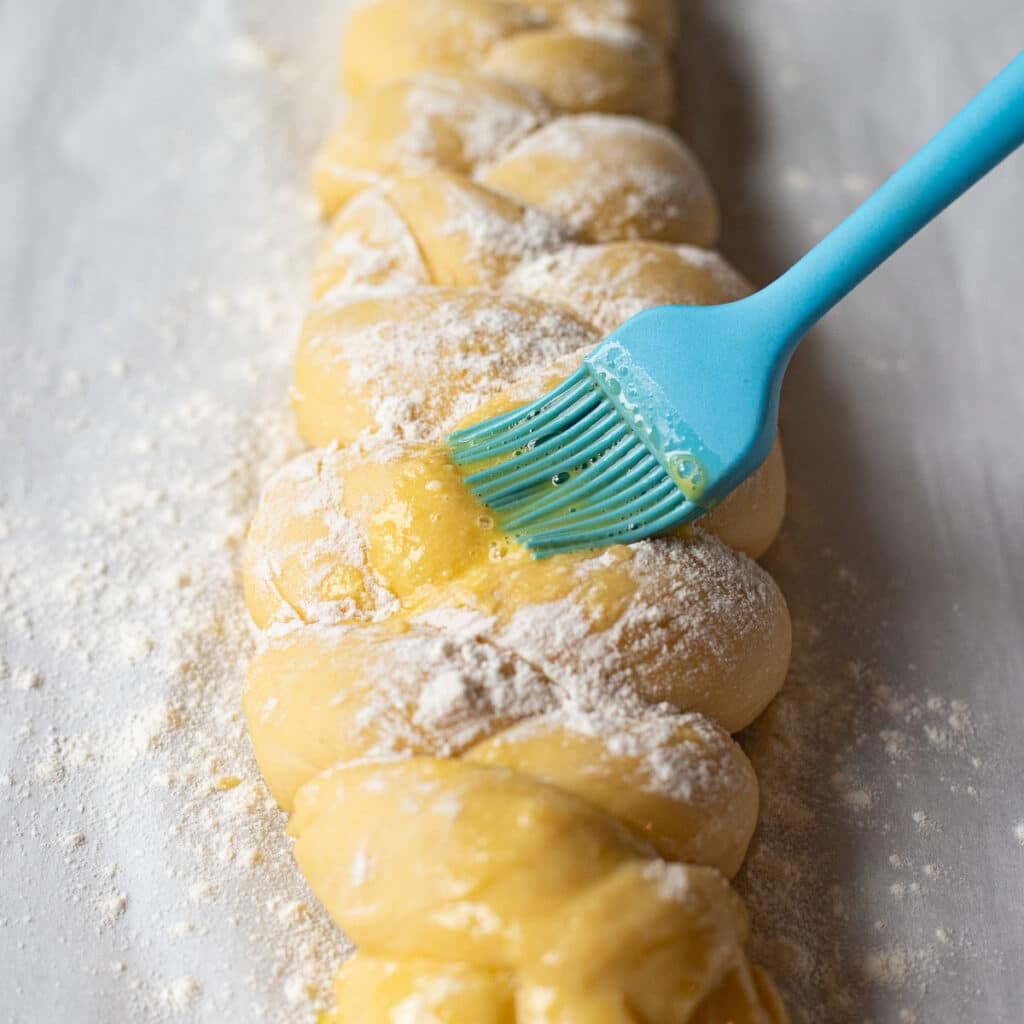
Prepare the challah for baking
Before you bake your challah, give it a good slather of egg wash. Be sure to get the egg wash in all the crevices.
The dough will want to pull apart during baking, so be sure there is beaten egg everywhere.
Watch how to braid challah!
Ways to Enjoy Challah
You’ll never run out of ways to enjoy your homemade loaf of challah bread! It is just as good toasted as it is fresh, and can be enjoyed alone or incorporated into a variety of sweet and savory recipes.
Here are some ideas:
- French Toast: Challah is dense and absorbent, making it a perfect choice for the best French toast.
- Sandwiches: From classic deli-style sandwiches to grilled creations, challah’s sturdy texture holds up well against whatever you’re piling on.
- Bread Pudding: Challah’s ability to retain moisture makes it an ideal base for bread pudding, absorbing custard to create a silky texture.
Variations
Once you become a pro at making this recipe for challah bread, feel free to get creative! There are sweet and savory variations that you’ll love. Here are a few of my favorites:
- Raisin Challah: You’ll see this version a lot. Using plump raisins or even golden raisins adds a burst of flavor to the bread, making it a favorite for special occasions.
- Classic Challah: Sprinkle the top of your unbaked challah with sesame seeds or poppy seeds for an old-school twist that your grandparents would love.
- Whole Wheat Challah: If you’re seeking a heartier option, whole wheat flour can be substituted for part or all of the white flour, offering a nuttier flavor and a denser texture.
- Savory Herb Challah: By incorporating herbs like rosemary, thyme, or even garlic into the dough, you can create a savory twist that pairs well with various dishes.
- Chocolate Chip Challah: Not just for kids, chocolate chips lend a touch of indulgence to the bread, making it the perfect base for desserts.
DOES CHALLAH HAVE TO BE BRAIDED?
Challah does not have to be braided, but it is traditional to do so. The braiding of the bread has various symbolic meanings to Jews, and a braided loaf is also very pretty.
If you choose not to braid challah dough, you can form it into rolls or buns or simply bake it in a loaf pan.
HOW TO Store CHALLAH
The best way to freeze challah is to first wrap it tightly in plastic wrap. Then, place it into either an airtight container or a large freezer bag for double protection against freezer burn.
Try to squeeze as much air as possible out of the freezer bag. If you have a vacuum sealer, this is a great time to use it.
When you’re ready to enjoy your challah again, let it come to room temperature in a warm place and dig in!
When you make this recipe for challah bread, I’d love to hear about it! Drop a rating or leave a comment below. Enjoy!
For more bread recipes, try these:
- Parker House Dinner Rolls
- The Best Honey Cornbread Recipe (with gluten free option!)
- Homemade Cherry Bread Recipe
For more Jewish recipes, try these:
- Sweet Noodle Kugel Recipe (Jewish Noodle Pudding)
- Latkes Recipe (Jewish Potato Pancakes)
- Best Raspberry Rugelach Cookies
How to Make the Best Challah (Homemade Bread Recipe)
Ingredients
- 4 cups all-purpose flour
- 1 envelope active dry yeast
- 3/4 cup warm water 110-115F
- 1/3 cup sugar
- 4 eggs divided
- 1 Tbsp. kosher salt
- 1/4 cup vegetable oil
Instructions
- Dissolve the yeast in warm water for 5-10 minutes.
- Whisk together the flour, sugar and salt in a large mixing bowl. Make a well in the center and add 3 eggs and oil. Whisk the eggs, pulling a little bit of flour into the center to make a paste.
- Pour the yeast mixture into the well. Stir with a wooden spoon until combined. The bread dough will be shaggy.
- Preheat oven to 200 degrees.
- Dump the dough onto a floured surface and knead for 8-10 minutes. (Alternatively, put the dough into the bowl of a stand mixer fitted with a dough hook and knead on low speed, 8-10 minutes). The dough will be soft and smooth.
- Turn off the oven. Place dough in an oiled bowl and cover with a kitchen towel for the first rise. Place into the warm oven for 1-2 hours, until doubled in size.
- Punch the dough down and divide into 3 equal pieces. Roll each piece into a rope 16-18 inches long. Line the ropes up next to each other on a baking sheet lined with parchment paper. Pinch the ends together on one side.
- Braid the dough: Cross the center rope over the rope on the right. Then, cross the center rope over the rope on the left. Continue crossing center over right, center over left, until the dough is braided. Tuck the ends under.
- Dust with flour, cover with a kitchen towel and let rise for 1 hour.
- Preheat oven to 350 degrees. Beat the remaining egg with 1 Tbsp. of water in a small bowl. Brush the entire loaf with the egg wash.
- Bake 15 minutes. Rotate the baking sheet and bake another 20 minutes. Allow challah to cool to room temperature on the sheet pan before slicing.
Good recipe love the Jewish traditions. Feast days are wonderful to learn .and the ways of the Torah is all inspiring.
The second time the bread rises (when it’s covered with a towel), do you place it in the oven or just the counter top? I’m very new to baking yeast bread.
Hi Jennifer!
The second rise is just on the counter top. We just use a warm oven for the first rise to speed up the process. Let me know if you have any other questions!
You left out baking powder.
Hi Faith,
This recipe doesn’t require baking powder 🙂
Lovely recipe and write up. Please note that Jews say Challah. Not Challah ‘Bread’. E.G. Every Shabbat we have Challah.
Hi Nik,
I understand, I am Jewish! The term “challah bread” makes it easier for people to find the recipe in Google. I hope you enjoy the recipe!
Thank you for posting Challah bread recipe, looking forward to making it ?
Hi Carolyn,
I hope you love the challah! Let me know how it goes! 🙂
Am I missing it, or have you omitted any braiding instructions? That would help a bald braider.
Hi Doug,
Bald braider made me LOL 🙂
I will add some process shots so you can see, but for now, here’s what to do:
Line up the 3 ropes of dough parallel to each other and gather the tops together, as per the photos on the post. Cross the right rope over the center rope, so that it becomes the center rope. Then, cross the left rope over the center rope, so that the left is now the center. Continue to cross right over center, left over center, until the braid is complete. Gather the ends together and tuck them under.
Hope this helps 🙂
Any advice for doing this with all-purpose Gluten Free flour?
Hi Rachel, I have not tested this recipe with gluten free flour, but I’m dying to! I’d recommend using Cup4Cup Multipurpose Flour. I’ve had the best results with this brand for baking. Let me know! 🙂