
As an Amazon Influencer, I may earn commissions from qualifying purchases from Amazon.com.
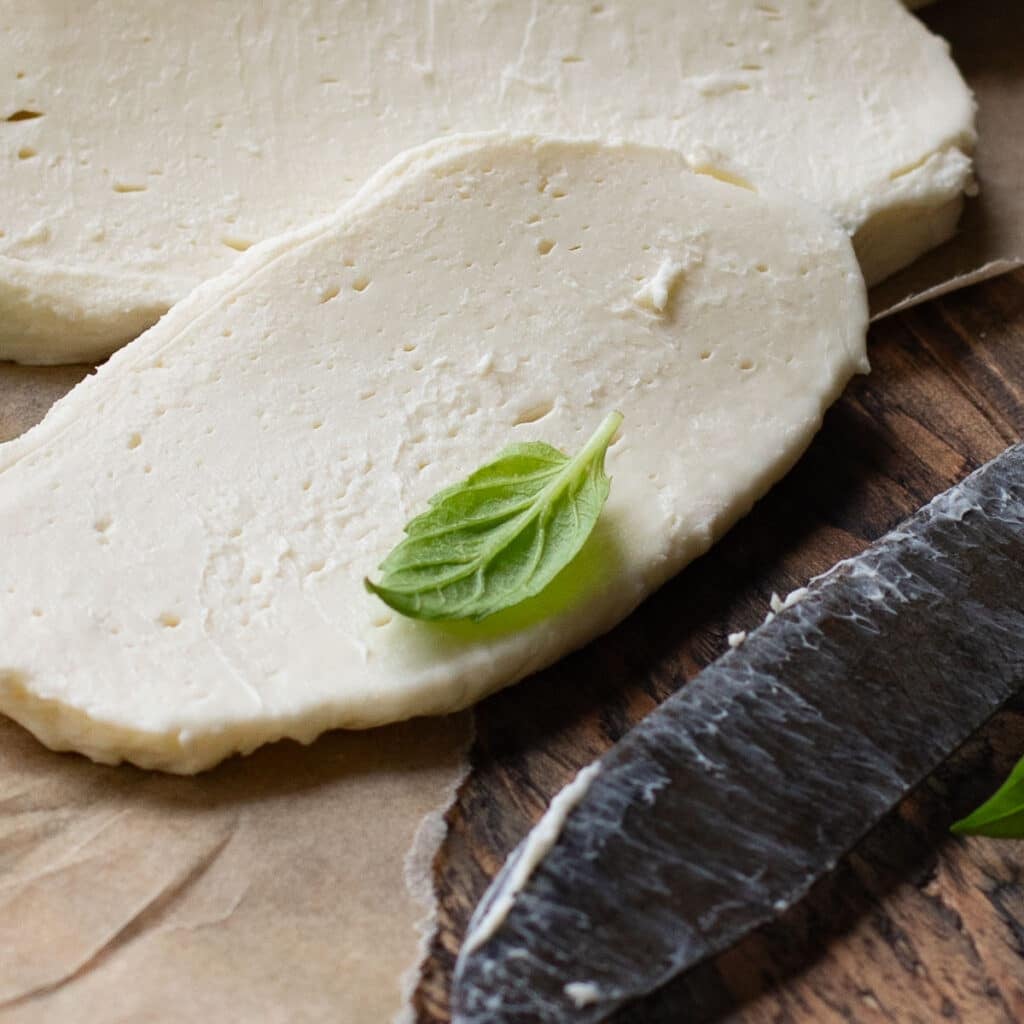
This is the easiest recipe for delicious, homemade mozzarella cheese that you’ll ever find!

You won’t need rennet, citric acid or any other foreign ingredients. With only 3 simple ingredients, I’ll show you how to make creamy, fresh cheese that you’ll be making on repeat!
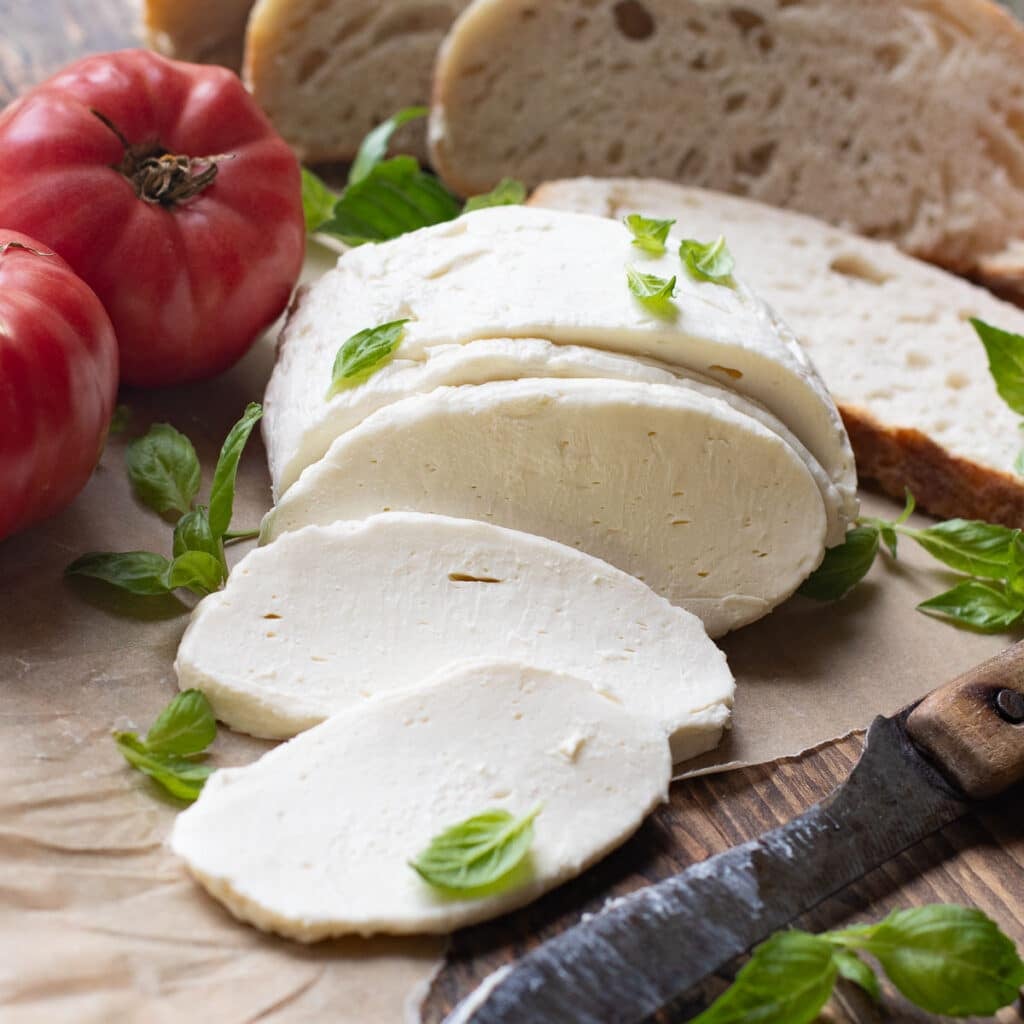
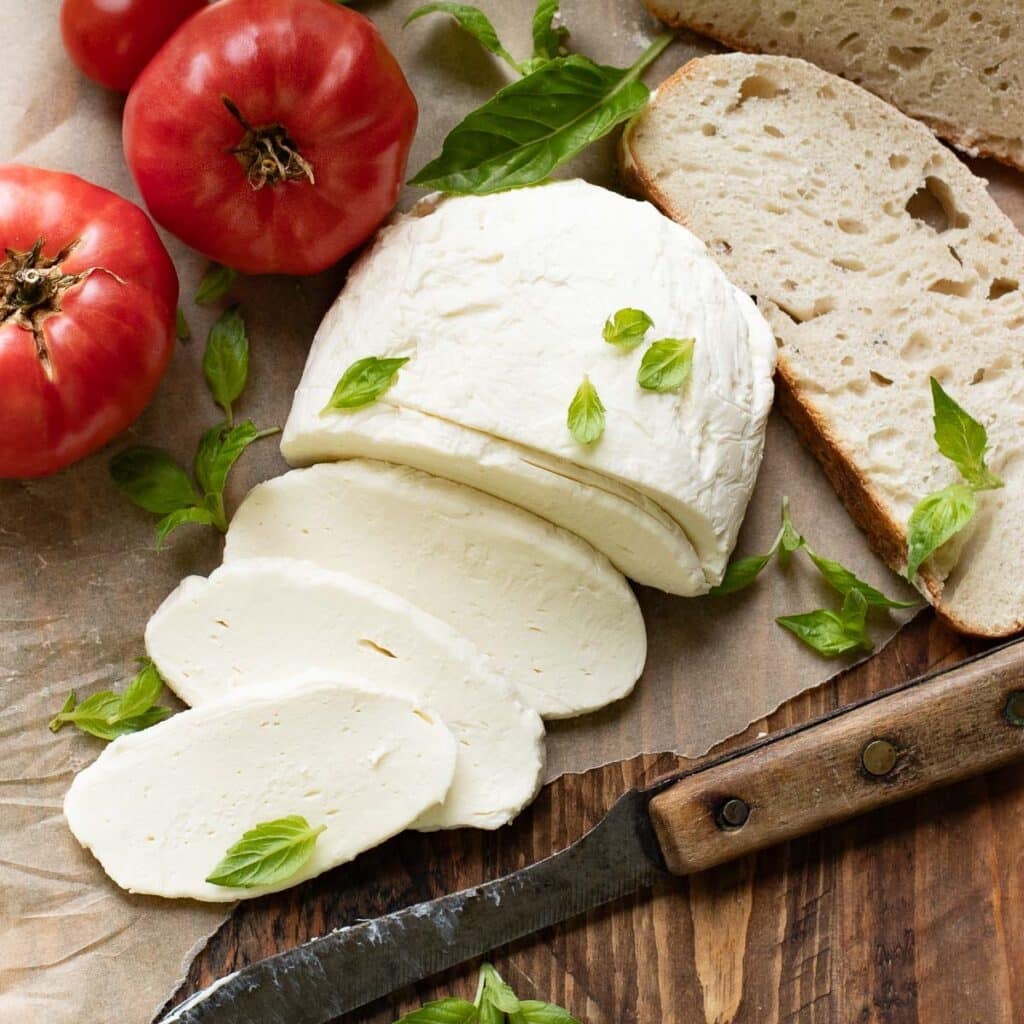
There’s nothing like fresh mozzarella cheese, garden fresh tomatoes and a loaf of homemade sourdough. I could literally live on this meal alone!
In the summertime, when the tomatoes are exploding out of the garden, I love whipping up this homemade mozzarella cheese recipe to go with them.
You won’t believe it, but the entire mozzarella-making process takes under an hour! Wait until you see how easy it is!

Ingredients
Three ingredients is all you’ll need for this simple recipe!
- 1 gallon of milk. I recommend using whole milk, as I have not tested this recipe using a reduced fat milk.
- Plain white vinegar. This replaces the rennet as a coagulant, which will facilitate the separation of the curds and whey.
- Salt. As you get more experienced in making your own cheese, you can experiment with the amount of salt you like. I recommend starting with 1 1/2 teaspoons.
Tools Needed for Making Homemade Mozzarella
For the best results, make sure you’ve got the right tools! And since you’ll want to be making homemade cheese all the time now, it’s worth it to have these essentials on hand:
- Kitchen thermometer. You’ll need to monitor the temperature of the milk as you heat it. If you don’t have an instant-read thermometer, they’re pretty inexpensive to purchase on Amazon.
- Mesh strainer. If you don’t have one, you could use a colander.
- Cheese cloth. This is an essential and inexpensive item that you can find in any grocery store. It’s how we’ll squeeze all the hot whey out of the cheese curds.
How to Make Homemade Mozzarella Cheese
Heat the milk
Start by pouring your gallon of whole milk into a large pot. Heat the milk over medium or even medium-low heat.
Stir the milk with a large spoon to prevent burning the bottom of the pot as it warms.
Monitor the temperature with your digital thermometer. Once the milk reaches 120F degrees, turn the heat off.
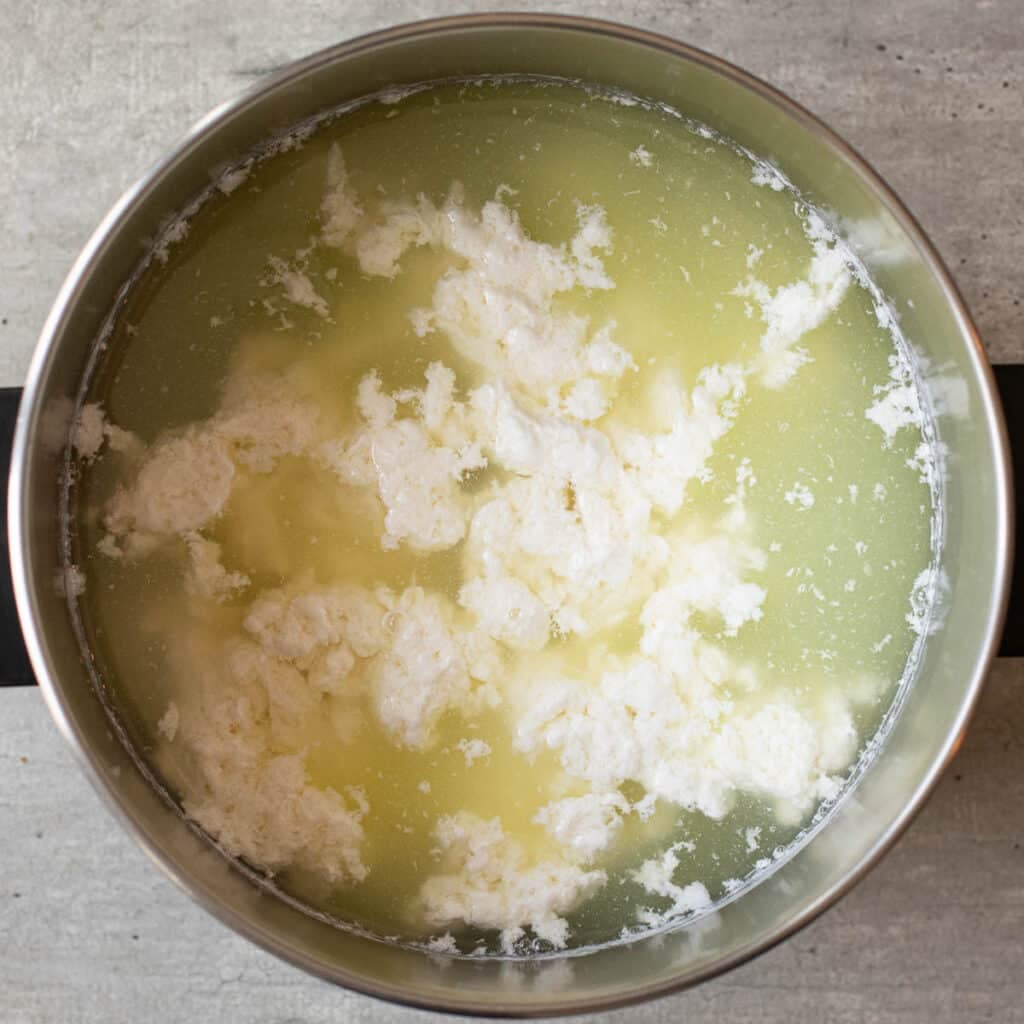
Add the vinegar
Now, pour in the vinegar and stir the mixture for 30 seconds.
You’ll see the curds start to form and it will become increasingly difficult to stir the mixture. It’s so cool to watch this process unfold right before your eyes!
Now, cover the pot and let it rest for 15 minutes.
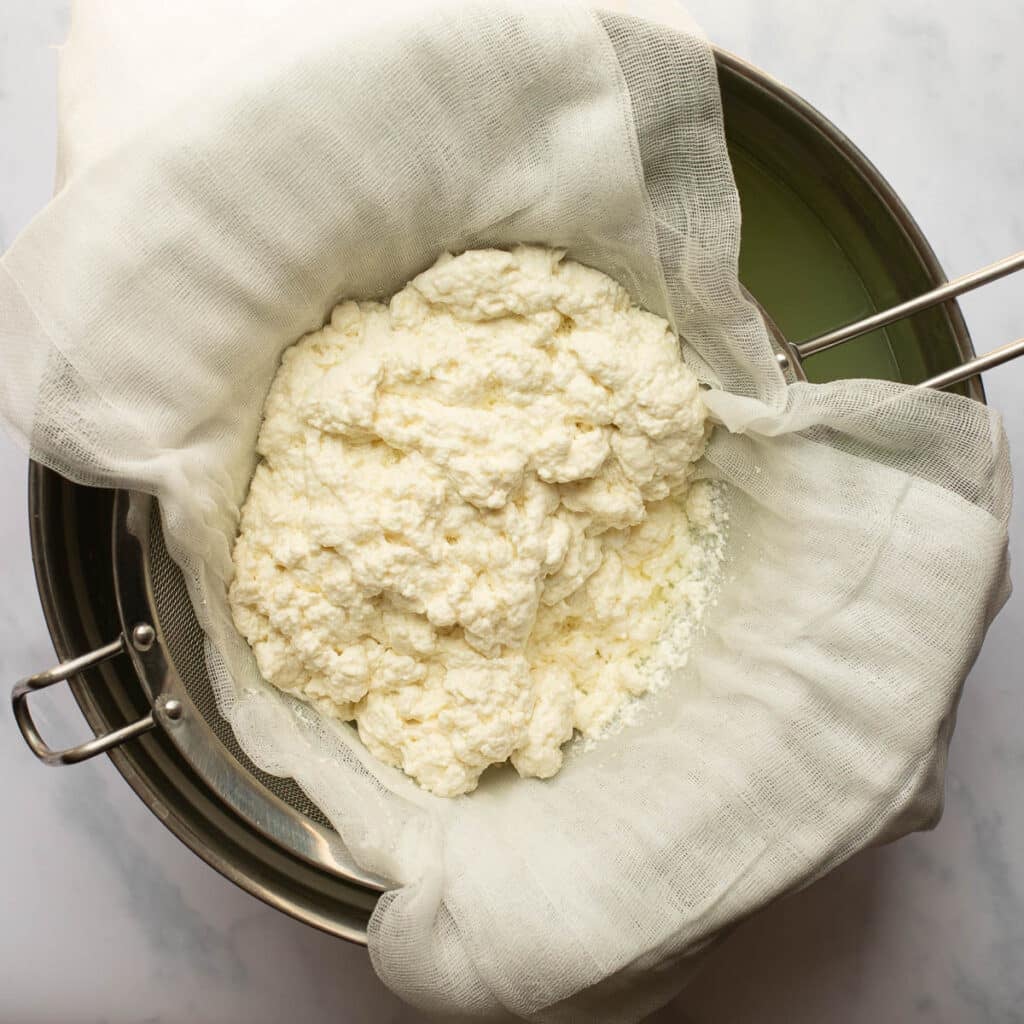
Strain out the whey
While the curds and whey are resting, set up your strainer over a large bowl. Place the bowl in your kitchen sink to catch any spills.
Then, lay pieces of cheese cloth over the strainer. I recommend using at least 2 or 3 layers of cheese cloth.
If your strainer and bowl are large enough, go ahead and pour the mixture directly from the pot into the strainer. You could also use a slotted spoon to transfer the curds into the strainer and just discard the whey.
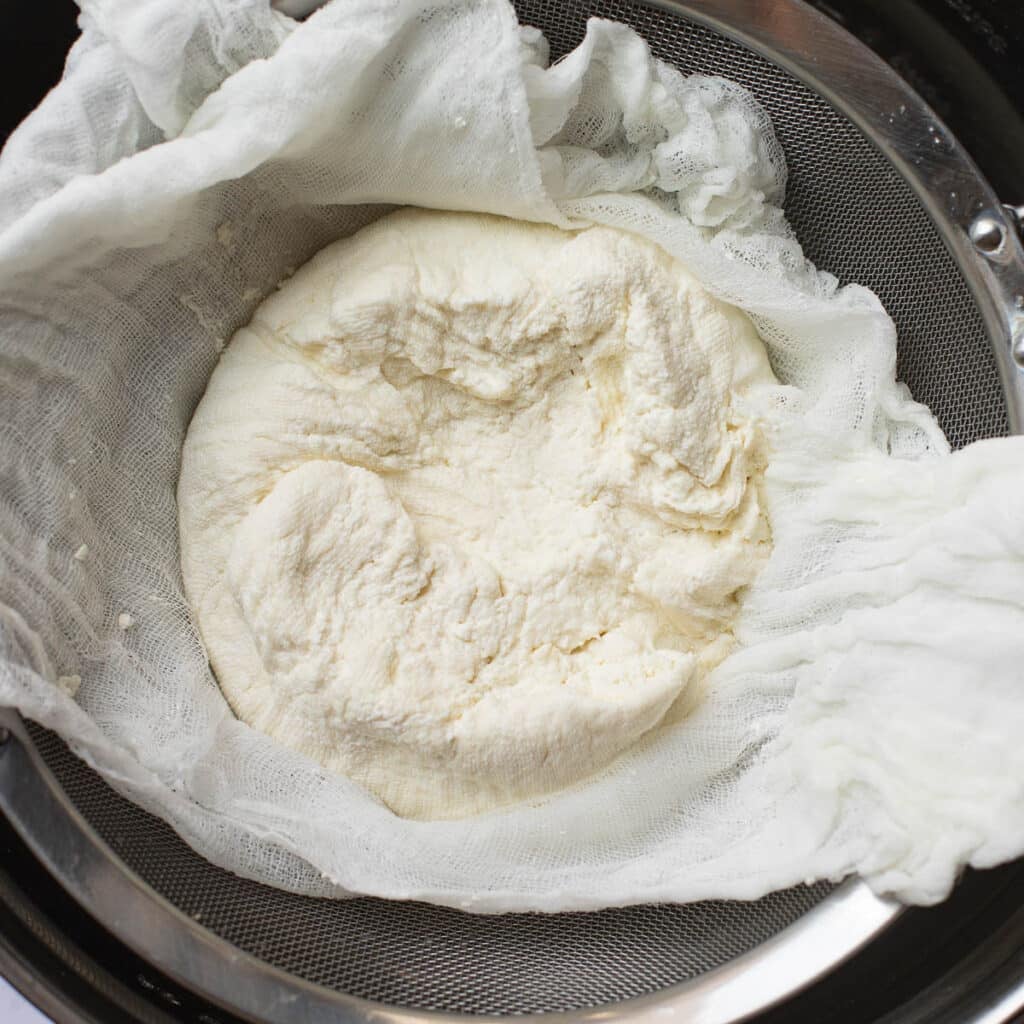
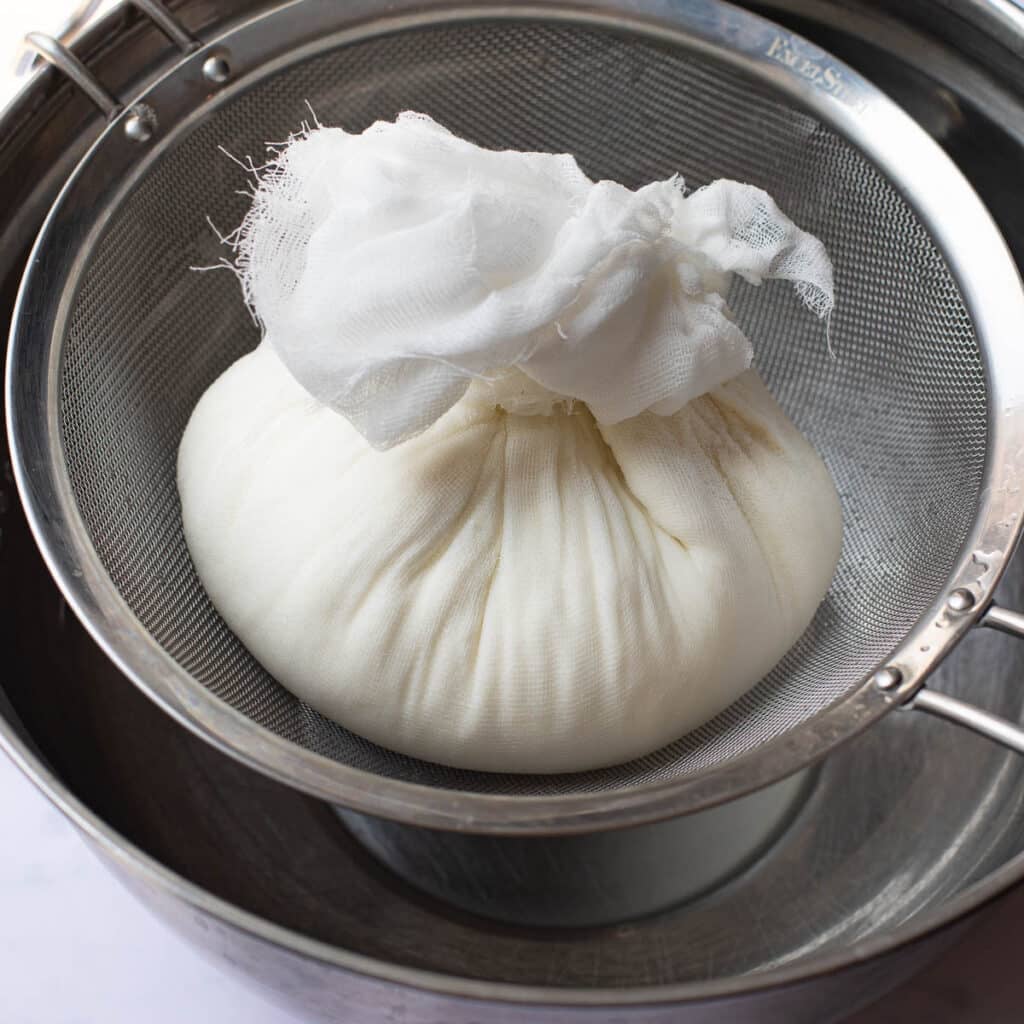
Squeeze squeeze squeeze
Gather the cheesecloth together around the curds and squeeze out as much whey as you can.
Really squeeze hard until almost nothing comes out. The less moisture, the easier your homemade mozzarella will be to slice.
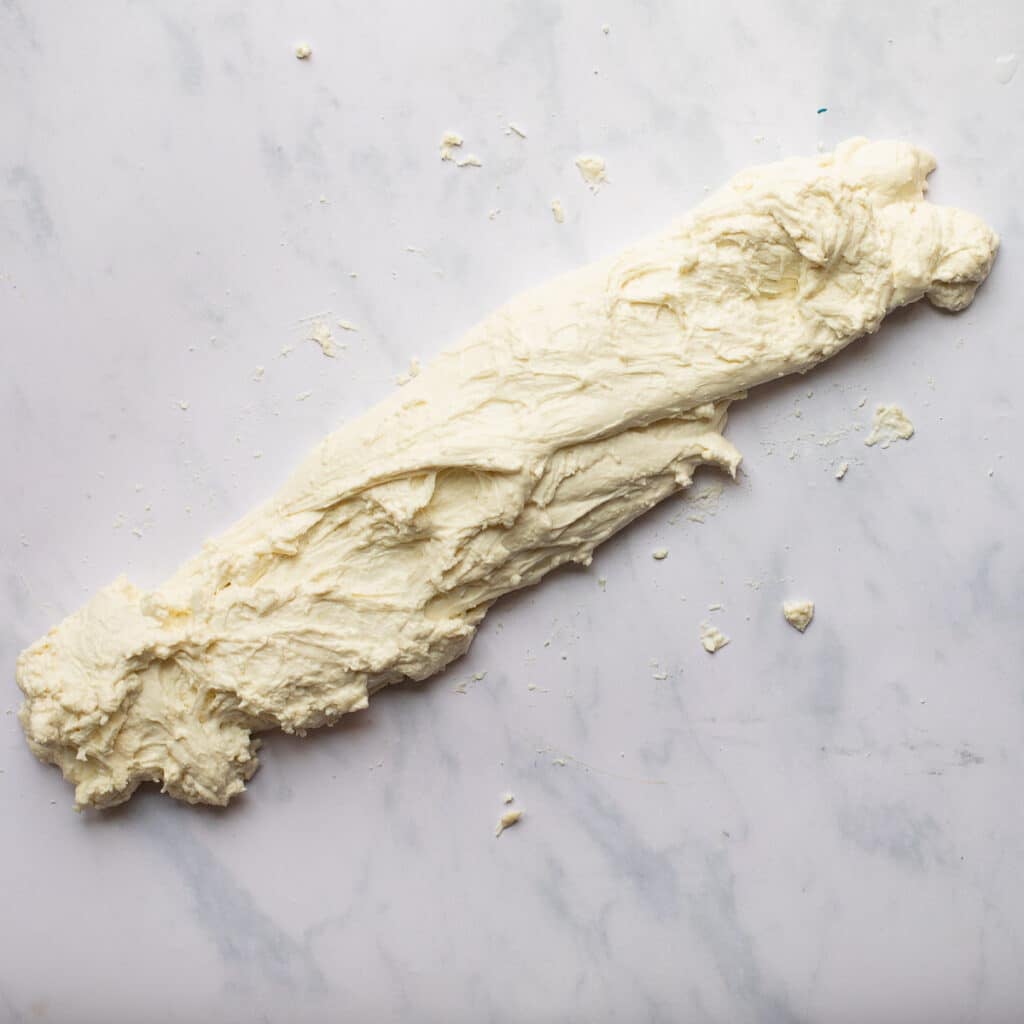
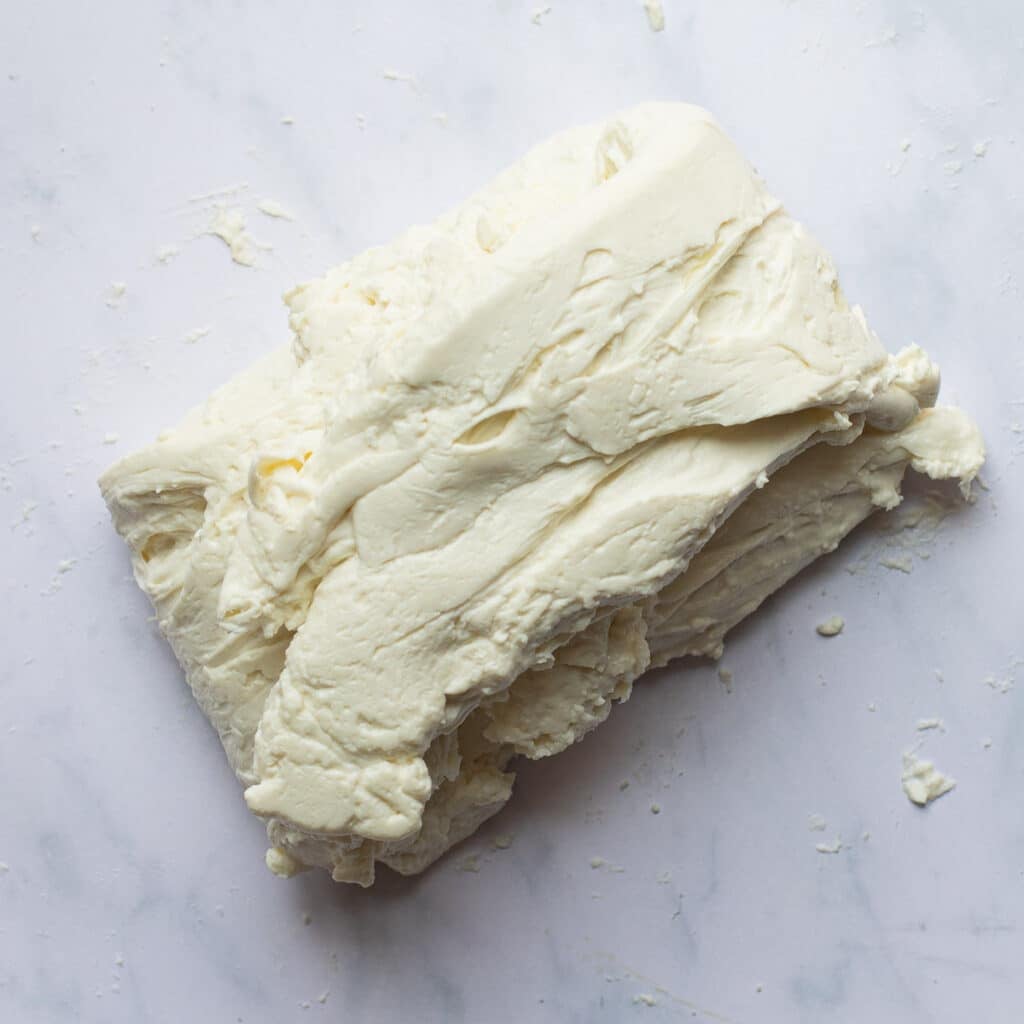
Stretch and Fold the Cheese
At this point you should have a rough ball of cheese.
Place it in a small bowl sprinkle it with a little bit of salt. Now, heat it in the microwave for 30 seconds. It will be hot to handle, but try your best to stretch it apart. Then, fold the ends over each other.
Stretch and fold a few more times, until the cheese starts to resist. The cheese will become harder to stretch as it cools, so you’ll want to repeat the microwave-stretch-fold process one or two more times.
Note: If you have trouble stretching the cheese, it means it’s not hot enough. Microwave again!
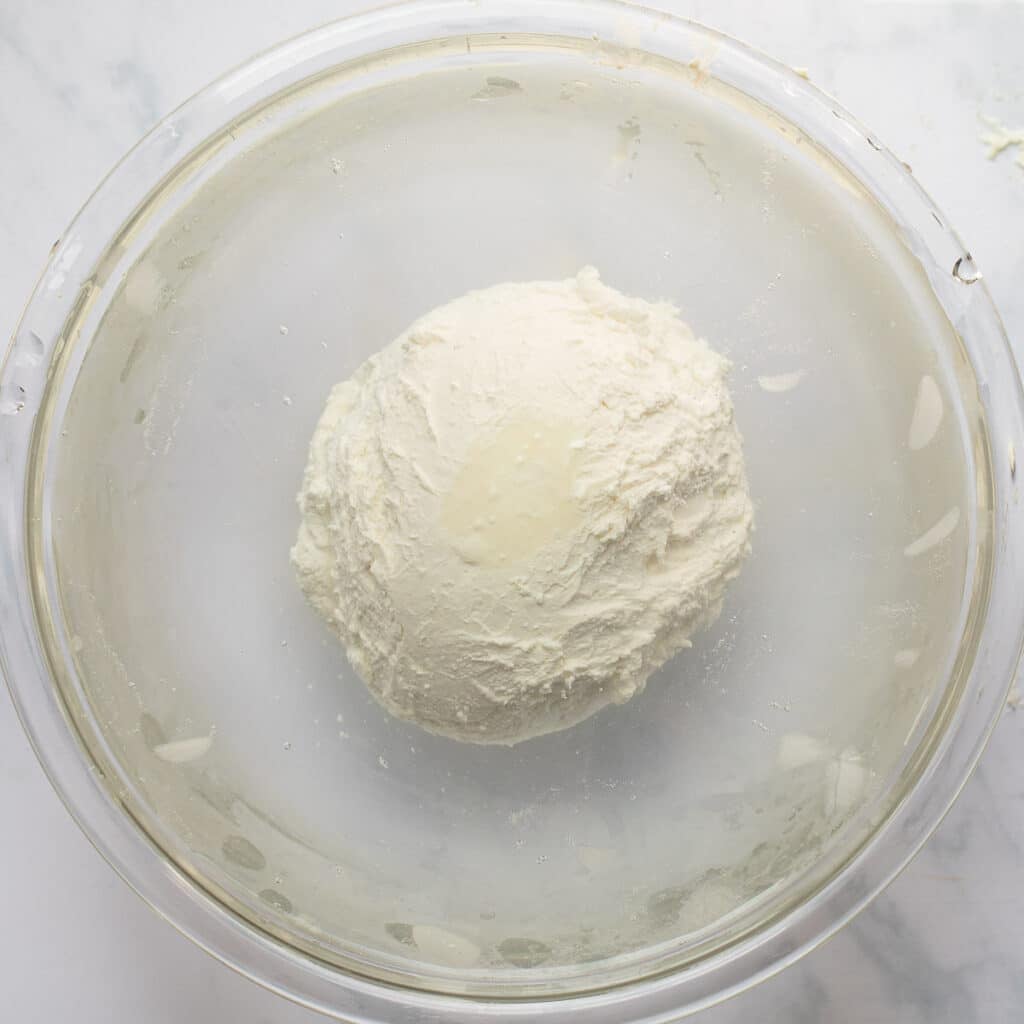
The Ice Bath
Once you have a cohesive ball of mozzarella (it won’t be completely smooth), it’s time for the ice water bath.
Set up a bowl of cool water and ice cubes and gently place the ball of cheese into it. Allow the cheese to sit in the ice water bath for 15 minutes.
Then, your homemade cheese will be ready to enjoy!
Serving Suggestions
Let’s get to the best part about making your own homemade mozzarella cheese – eating it! Here are some of my favorite ways to enjoy:
1. Homemade pizza: Make a classic margherita pizza with slices of fresh homemade mozzarella cheese, tomatoes and torn basil.
2. Mozzarella sticks: Slice your cheese into sticks and dredge it in beaten egg, followed by Italian breadcrumbs. Fry until golden brown.
3. Caprese salad: Enjoy your homemade mozzarella in this classic preparation, complete with fresh tomatoes, extra virgin olive oil and crusty bread.
Storage Instructions
Your fresh homemade cheese will last in the refrigerator for up to one week. Here are the two best ways to store it:
1. Wrap the cheese tightly in plastic wrap or place it in an airtight container. This will keep your cheese firm and sliceable.
2. Immerse the cheese in water and seal it in an air-tight container. This helps preserve the milky flavor.
FAQs
In order to stretch the cheese, you must heat it. Try using placing it into an oven set to 400 degrees for 1 minute at at time until it’s almost too hot to handle. Then stretch.
If your cheese won’t stretch, it means it’s not hot enough. Pop it back into the microwave until it’s almost too hot to handle and try again.
If you end up with mushy mozzarella, it means you didn’t squeeze out enough of the whey. The curds are the good stuff! Be sure to isolate them as much as possible before so you get firm, sliceable cheese.
When you make this homemade mozzarella recipe, I’d love to hear about it! Drop a star rating or leave a comment below. Enjoy!
For more recipes for cheese lovers, try these:
- Easy Whipped Ricotta Cheese Appetizer (Baked Dip)
- The Best Brie Mac and Cheese Recipe (Easy and Creamy)
- Starbucks Grilled Cheese at Home (Copycat Recipe)

Homemade Mozzarella Cheese
Equipment
- 1 kitchen thermometer
- 1 cheesecloth
Ingredients
- 1 gallon whole milk
- 1 cup white vinegar
- 1 1/2 tsp. salt
Instructions
- Heat milk to 120 degrees F in a large pot over medium heat, stirring.
- Once the temperature reaches 120 degrees F, turn off the heat. Pour in the vinegar and stir for 30 seconds.
- Cover the pot and let it sit for 15 minutes.
- While the milk mixture is sitting, set up the strainer: Set a strainer over a large bowl. Place several sheets of cheesecloth over the strainer and make sure that there is overhang.
- Pour the curd into the strainer, allowing all of the whey to drain out.
- Gather the ends of the cheesecloth together and squeeze as much moisture out of the curd as possible. Continue to squeeze until no excess whey comes out.
- Place the curd into a microwave safe bowl. Sprinkle the salt over top. Microwave for 30 seconds.
- When the curd is cool enough to handle, begin to gently stretch it out, then fold the ends over each other. Repeat this process several times. As the cheese cools, it will be harder to stretch.
- Repeat step 8 again. If you need to do it a 3rd time, that's okay. Remember, it will be harder to stretch the cheese as it cools.
- Now, work the cheese until you have a smooth ball. It won't be perfect! Place the cheese into a large bowl of ice water. Allow it to rest in the ice bath for 15 minutes.
- Remove cheese from ice bath and enjoy.
Couple questions:
1. I react to corn so white vinegar isn’t an option for me. Could I sub a different vinegar (acv, wine, etc.)? And does it matter if the vinegar is raw or pasteurized (e.g. raw acv)?
2. Would this recipe work with different dairy milks, such as goat?
Thank you for this excellent recipe. I plan on trying my first batch using A2/A2 milk; my spouse and I are super excited to have A2/A2 cheese!
Hi Kate,
I have not tested this recipe using other vinegars or milks, but I think you’ll be fine using ACV or goat milk. If it’s hard to stretch, just keep warming it in the microwave in 30 second increments until you can stretch it. Let me know how it comes out!
It turned out great! I’m ready to enjoy!
Hi Shelley, I’m so glad you enjoyed the fresh mozz! Isn’t it so easy?! 🙂
You can use lemon juice! Maybe let the mixture sit together a little bit longer. I haven’t tried it but I have a friend that is allergic to vinegar and this is how she would make her cheese. Hope that helps 😊
White vinegar isn’t made from corn
I just made this, and wow it is super good! It was so easy to make.
My previous attempt at making mozzarella was a complete failure. I came across this recipe and tried it. Instant success! The recipe was super easy to follow and the cheese came out perfect. Of course the best thing is that this mozzarella tastes SO good. Yeah, it’s gone. I should have hidden it from my family. lol
Hi Maureen, I am LOLing 🙂
So glad you enjoyed the mozz, and next time make a double batch!
We don’t have a microwave so maybe it’s why mine didn’t turn out so great. It’s got a creamy spreadable texture. :/ any tips? Is the microwave the trick? Did I not work the cheese long enough?
Thanks!
Hi Kelly,
Yes, heating the cheese is essential to the process, because it needs to be warm in order to stretch it. I would pop it into a warm oven in increments, just like the recipe says to do in microwave. Hope this helps. 🙂
I was wondering if the oven or a double boiler would work. I also don’t have a microwave.
Hi Kaye,
Yes, try a warm oven. You could also place the cheese back into the pot of hot whey to warm it up. Let me know how it goes!
You can keep the way slightly heated throw your balls into the warm way and warm it up that way but you will have to squeeze it again to remove some of the liquid if you don’t have a microwave
Skip the microwave, melt it in hot whey
It’s not mozzarella without that
My first try was a failure. When I took it out of the microwave, it did stretch at all. I tried many times to fold press, fold press, but could never get it to stretch at all. Did I not get enough of the whey out. I squeezed and squeezed until I could get any moisture at all.
Any ideas?
Ugh I’m sorry it didn’t work out, Kathleen. How many tries did you give it in the microwave? The cheese should be almost too hot to handle in order to get it stretchy. You may have needed to microwave it several times.
I’m at the same point right now! I don’t know what the heck I did wrong but it’s really hot coming out of the microwave and it’s just completely falls apart. This is about my fourth time.
Ugh Dave this is so upsetting! My only thought is that there’s still too much whey in the cheese. Did you make sure you squeezed literally every drop of moisture out with the cheesecloth?
Lmao attempted to make cream cheese and instead uh made mozzarella cheese. Got distracted and heated the milk waaayyy too high… thank goodness for this recipe. Now I got a yummy ball of mozzarella 😅😅
Kylie, haha that’s amazing!! Glad it all worked out 🙂
Can I freeze this cheese
I don’t recommend freezing it, I don’t think it would defrost well.
I’m curious about why. I freeze fresh mozzarella (including buffalo) all the time.
At least in my experience you can tho you might have a different experience
I freeze it as well, and have never had any problems over many decades, so yes, it will freeze just fine, like cream cheese freezes fine, imo.
I’ve been wanting to try to make mozzerella for a long time and this recipie made it so simple! The cheese came out great! can’t wait to make it again!
Hi Danielle,
Yayy so glad you loved it! And thank you for sharing your feedback!! 🙂
I think I failed mine tasted like vinegar what did I do wrong, did I not get enough whey out?
Hi Lisa,
It sounds like you didn’t squeeze enough whey out. The cheese should be very very dry after you’re finished squeezing, with no moisture still coming out. Did you use a cheesecloth? Also check the measurements to make sure you used the right amount of vinegar.
Ok I will try it again from the sounds of it I didn’t not get all the whey out I did use a cheese cloth and the correct measurements, thank you
It worked and tasted amazing thank you for the tip!!!
Yayyyy!!
This came out perfect and it was so easy to make! Thank you so much for the recipe.
Hi Tracy,
I’m so glad you enjoyed it! Thank you for your feedback 🙂
Can you cut the recipe in quarters, using 1 quart of milk and 1/4 cup of vinegar?
Hi Marina,
As long as the measurements are all scaled to 1/4, I think you should be fine!
Great and very simple recipe. I read a lot of different recipes but decided to try this one and I’m glad I did. I had to adjust as I had 1.5 litres of milk.A mix of 3.25% and skim as I needed to use up milk before it soured. It turned out great. I don’t have a microwave and it’s too hot here today for an oven so I boiled water in a pot and placed the cheese in a slotted spoon and submerged it That worked perfectly to reheat the cheese for stretching. Used organic pink salt. It’s wonderful Thank you
Hi Raelene,
I’m so glad you enjoyed the recipe, and thank you for sharing your feedback! 🙂
turned out amazing… can I just keep it in the fridge covered or how should i maintain it? Thanks for great recipe!
whoops just finished reading the last part of post… thanks!
Yes! Wrap it in plastic wrap and keep it in the fridge. So glad you enjoyed it, and thank you for sharing your feedback! 🙂
My whey is out but cheese is really sticky even after microwaving???
A little sticky is ok, but if it’s very sticky it means you didn’t squeeze the whey all the way out. Try to keep stretching and folding – it should become a little less sticky as you do this. Let me know!
I was a little skeptical to try this recipe but it was GREAT! And it was delicious. It was unbelievably easy to make too. I had a gallon of standard store bought whole milk on hand and this cheese came together perfectly from it.
After squeezing the curds in the cheese cloth, the curds were sort of grainy, but I microwaved it about 45 seconds and the cheese melted and formed within about 20 seconds. I couldn’t believe it was so easy.
Hi Monica,
I’m so glad you enjoyed the recipe and that it was easy for you! Thanks so much for sharing your feedback. 🙂
Hi. Everything went great until I put it in the microwave then it progressively got soupier after trying for 30 seconds each time. It is now more like ricotta cheese (here comes lasagna). I did not have cheesecloth but used a spoon to smoosh out as much whey as possible. Any suggestions on what I did wrong. Thanks!
Hi Kathryn,
A cheesecloth is absolutely necessary in order to squeeze it as dry as possible. Sounds like there was still too much moisture in there. Hope this helps!
Recipe was easy but my first time trying. I heated and stretched. The cheese formed into a nice ball. It sliced well. The cheese had more of a firm cream cheese consistency rather than a true mozzarella consistency. Did I not get all the whey out or did I not stretch enough?
Hi Steve,
Yes, it sounds like there was still too much moisture. It’s happened to me too. Next time, really squeeze the life out of it!
Recipes outstanding first time ever doing this turned out beautiful! Thank you very much very much appreciated! Oh something I learned from my mom years ago in lieu of cheesecloth pantyhose will work just fine. You should have seen me at Walmart looking at pantyhose cuz they didn’t have any cheese cloth. Anyways God bless and keep up the good recipes
Chris, I am LOLing!! This is the best tip ever. Pantyhose!! 🙂
Hi. I tried your recipe today and the taste is great! But my cheese was not cooperating when trying to stretch. It just tore it ended up being a lumpy ball similar to a cottage cheese texture. What did I do wrong??
Hi Maegen,
It sounds like the cheese was not hot enough when you were trying to stretch it. It should be almost too hot to handle. Microwave it in intervals, or place it back into the pot of hot whey to get it really warm, and then it should stretch for you. Hope this helps!
My first time trying home-made mozarella and it turned out great. I followed your recipe exactly. My question – if I wanted to add basil into the cheese, at what point would I do it?
Hi Maria,
I’m glad you enjoyed the homemade mozz! With fresh herbs, you’d want to fold them into the cheese when you’re almost finished stretching it, like when you don’t need to heat it anymore. Hope this helps!
Thank you. It does help!
This was a perfect recipe! The instructions were clear and easy to fillow. I’m so pleased with the results and will be making this cheese over and over again!
Hi Emily,
I’m so glad you loved the recipe! Thank you so much for sharing your feedback 🙂
I made this cheese last night and just tried a couple pieces tonight. I’ll never buy mozzarella from the store again. So good! This recipe will be my go to for the rest of my life! Fun to make!!
Hi Stacie,
I’m so glad you loved the recipe! We live on this cheese. Thank you so much for sharing your feedback 🙂
My raw milk never separated . It was curdled milk only. What happened.
Sue
Hi Sue,
Sorry to hear that happened! Was your milk heated to 120F degrees? Did you check your measurements? If the milk is heated properly, the curds and whey should separate almost immediately after you pour in the vinegar. Hope this helps 🙂
The third microwave ruined it. It was perfect after two
Hi Randall,
Bummer! I hope you’ll try the recipe again 🙂
Can you use ultra pasteurized milk? I want to use organic and i can only find ultra pasteurized!
Hi Angie,
Because ultra-pasteurized milk is heated to such a high temperature, it could affect the way the curds and whey separate during the cheese making process. For this reason, I don’t recommend using it for making cheese. Sorry!
When do I add the salt?
Hi Keith,
Step 7 in the recipe card – sprinkle the salt on before you microwave the cheese. Hope this helps!
Hi,
Is it possible to use the whey in other recipes? I’ve read other mozzarella recipes that say the whey has a lot of protein and can be used in other recipes. But those recipes use rennet instead of vinegar. Also, is it possible to freeze the cheese?
Thanks,
Josh
Hi Josh, yes, whey is protein-rich and can be used in lots of applications from kitchen to garden and even pets! I like to cook grains in whey instead of water because of the extra protein it adds. Spend some time on Google exploring the different ways you can use it. As a general rule, I don’t like freezing cheese. The consistency is never the same after you freeze it. Hope this helps 🙂
I found a great recipe for making caramel from the whey. It was sooo good
Omg Amber that’s amazing!! What a great use for the whey!
This recipe is so easy and I add the vinegar exactly when it reached 120 but then, I forgot to let it rest for 15 minutes.
I could not get the curds to stretch 😩
Came out great! I can’t believe how easy it was.
Hi Ilyse! I’m so glad you enjoyed the recipe, and thanks so much for sharing your feedback 🙂
We never finish a full gallon of milk, so I used a half gallon for your recipe. It was so cool to see it curdle so quickly. Tasted great and I will definitely do that again! Thank you
Hi David,
Love the small batch idea! I’m so glad you enjoyed the recipe and thank you for sharing your feedback 🙂
I tried this recipe for the Holidays. I have always wanted to try to make mozzarella. I never thought it would be this easy, and the biggest test, my wife liked it! Thanks for such a great and easy to follow recipe, I plan to make more this weekend!
Hi Gregg,
I’m so glad that you and your wife enjoyed the recipe! It’s so much fun to make. Thanks for sharing your feedback 🙂
First time at making mozzarella and it turned out excellent! Easy instructions to follow! Thank you!!!
Yay Michelle I’m so glad you loved the recipe! Thanks for sharing your feedback 🙂
Are you using distilled white vinegar for the recipe? I really want to make this.
Thanks
Hi Joann,
Yes, distilled white vinegar. 🙂
I’m pretty sure that I’m the broken variable because there are so many positive reviews for this recipe. I usually take big pride in my culinary acumen. I was humbled as heck tonight when this was a total disaster area. It was my first effort at mozz-making. Long story short, my family is pivoting. Homemade mozz isn’t part of the plan any longer.
Hi Paige, I’m so bummed that it didn’t work out for you! I hope you’ll try again some time.
Turned out perfect! Great recipe & easy to follow instructions. Thanks!
So glad you enjoyed and thank you for sharing your feedback! 🙂
I think the salt is too much for this little ball but it’ll go great on a pizza! I had to take mine out of the ice bath and reheat it several times to get the right consistency. But it all worked out. Fun little kitchen project..
Hi Mark,
I’m glad it worked out for you! Definitely adjust the salt to taste. Thanks for your feedback! 🙂
Great and easy recipe, but I could use some advice so I can nail it next time!
Followed exactly, no substitutions or anything,
I had and easy time with the heating and stretching and my Mozzarella got nice and firm when I formed it into a ball and did the icebath. But when I tried it, it was pretty dense and creamy rather than a bit springy like all the fresh mozzarella I’ve ever had. In your pictures from the recipe it looks like it has that springy texture with the little airholes in it, mine doesn’t have any air holes when I slice it.
Did I maybe over/under work it? I I heated and stretched 3 times(but not for very long each time), I also thought I got enough whey out since the stretching part wasn’t super wet, but could too much moisture make it turn out dense too?
I also saw someone else reheated theirs after the icebath and kept working at it, could I fix it that way?
Any help/ideas you have would be super appreciated 😀
Hi Pebble! It sounds like there was still too much moisture in the cheese. You really want to squeeze the s$%t out of it till no moisture is left. If there is still moisture in the cheese, you can end up with a creamier result that’s more difficult to slice. Hope this helps!
This looks absolutely delicious, and I love how clearly you explain the steps — it’s so inviting and approachable. Recipes like this really help people feel confident trying homemade dairy for the first time, and that’s wonderful.
I hope it’s okay to add one small technical note, just for clarity. While this method will definitely produce something tasty and satisfying, rennet is actually an essential ingredient in most cheese making — especially for a cheese like mozzarella. The chemical process that forms curds with rennet is fundamentally different from curds formed with acid alone.
When you use acid (like vinegar or lemon juice), the milk proteins which in normal milk are floating around in bundles (like balls of yarn) to spread out and stop reppeling each other. This produces a fresh, crumbly curd — similar to ricotta — where the protein structure is more fragile and is not ealstic. THe proteins are essentially just in a very thick soup, but not linked at all.
Rennet works differently. It contains enzymes (mainly chymosin) that specifically target casein proteins in milk. Instead of simply untangling them like acids, it causes the casein micelles to link together in a structured network, like a weaved fabric. This creates a curd that is elastic, cohesive, and capable of being stretched and kneaded — which is exactly what gives mozzarella its signature “pasta filata” texture and melt.
So while this recipe will absolutely yield a very delicious fresh cheese — honestly, something closer to a fresh ricotta salata — it won’t behave like real mozzarella. It won’t stretch properly, and it won’t melt or brown the way mozzarella should if you use it on pizza or in cooked dishes. It will shine exactly as you describe: fresh, with tomatoes and basil, enjoyed right away.
Again, it looks lovely and very tasty — just important for readers to know that without rennet, they won’t quite get to true mozzarella territory. Still a beautiful fresh cheese, just a different one!
I got stretchy stringy flexible cheese by following this recipe. It’s nothing like ricotta.
I did some research before trying this recipe, and found people saying that using ultra pasteurized milk that will cause this type of recipe to fail and give a ricotta like consistency. You need regular pasteurized milk which isn’t heated to as high a temperature as ultra pasteurized milk is. Part of the problem that can cause issues is that milk which only says “pasteurized” might actually be ultra pasteurized.
Haven’t tried this yet, but had one question. When you turn the heat off, do you remove from the heat or leave it? Makes a big difference on electric stove vs gas.
Hi Jody,
Great question! Turn the heat off and leave the pot where it is. Let me know if you have any other questions!
My guess is I didn’t get it dry enough even though I squeezed it extensively. This recipe produced cream cheese, like absolutely perfect cream cheese. Sadly I cat use it on my pizza!
wonderfully easy and delicious
Hi Laren, I’m so glad you enjoyed the recipe! Thanks so much for sharing your feedback 🙂
I may be a nice product but for true mozzarella rennet is necessary.
What if you don’t have cheese cloth , is there something else I can use
It’s there something else I can use if I don’t have any cheese cloth
Hi Stacey,
Cheesecloth is available at most grocery stores and also on Amazon https://amzn.to/3Rho7xt. It’s inexpensive and I strongly recommend using it for the best results. That said, you could try using a linen dishtowel in the absence of cheesecloth. Just be sure to really squeeze all the moisture out. Hope this helps! 🙂
How many Oz ball will it make approx?
Hi Rick,
You should get about 16-20 ounces of cheese from this recipe. Hope this helps!
Squeeze squeeze, roll and stretch about 10-15 minutes. I separated the cheese into 4 balls a bit larger than tennis balls. Completed the ice bath. Now having a caprese salad for dinner. Easy recipe to follow. Yummy, too.
That’s the right answer, Jeannie! Squeeze squeeze squeeze! 🙂
This was my first time making homemade cheese, I was surprised how easy it was! I used flour sack towel instead of cheese cloth and it worked well.
I saved 5¢ if I’m comparing to the cheapest available mozzarella, but about $5 if comparing to mozzarella balls. It was delicious and I’ll definitely make it again!
Hi Hope, I’m so glad you enjoyed the recipe! Thanks so much for sharing your feedback 🙂
Used this recipe for my first time making any kind of cheese and it worked perfectly. Tasted great, using it for dinner. Thank you!!
Hi Kyrie,
Yay! So glad you enjoyed the recipe! Thanks so much for sharing your feedback 🙂
Is it possible to squeeze too much? My cheese came out pretty hard with a weird consistency. Not sure what I did wrong but I’m sure it was my bad! I will try again. Suggestions welcome!
Easy instructions( read them twice). First attempt and all worked well! Family loved it too! Thanks
Hi Donna,
So glad you loved the recipe! And thanks so much for sharing your feedback 🙂
Terrible recipe. No measurement for vinegar and it didn’t work at all. Not even one curd. I am a home cook, I cook a great deal I Italian food. This should’ve been an easy recipe to follow. I can’t imagine someone succeeded at this.
Hi Robert, I’m so sorry the recipe didn’t work out for you! The vinegar measurement (along with all other measurements and instructions) is clearly stated in the recipe card.