
This cherry danish pastry is going to be one of the most delicious things you ever make, and that’s a promise!
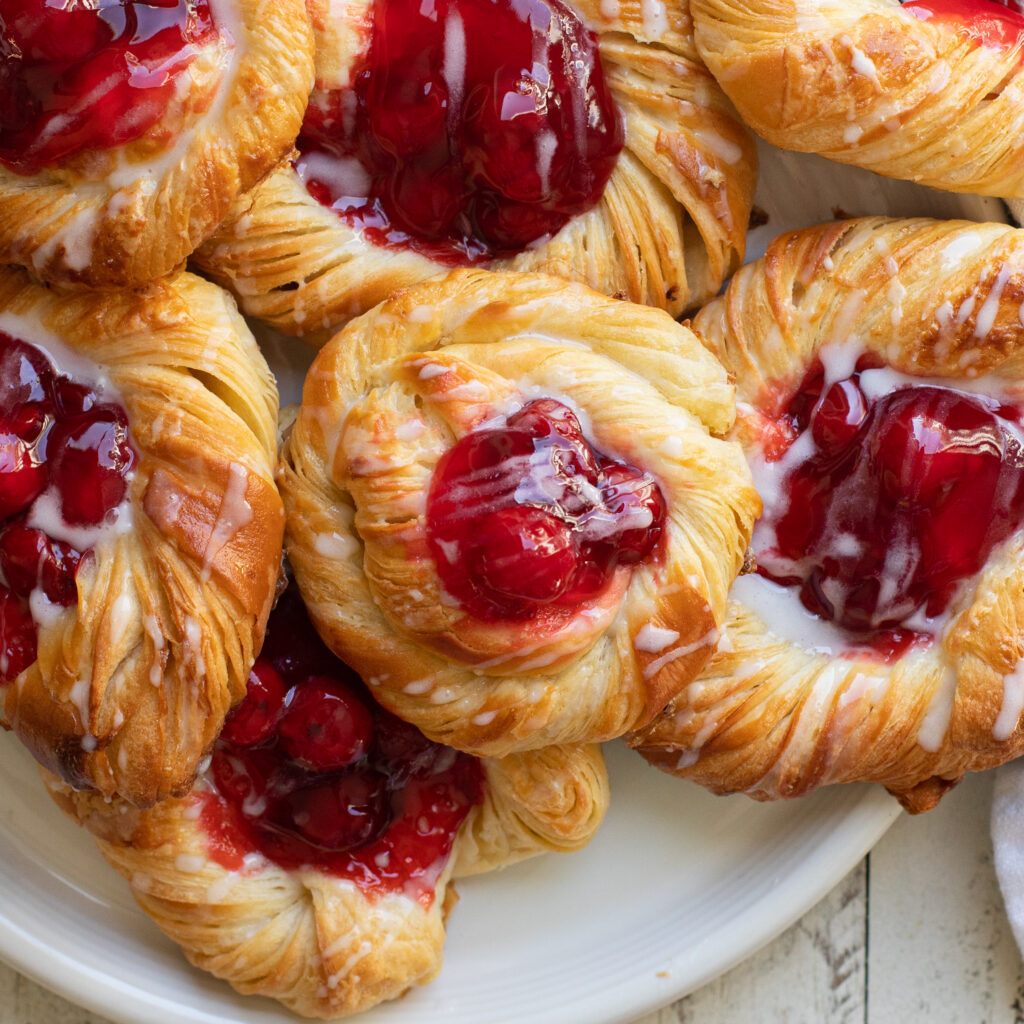
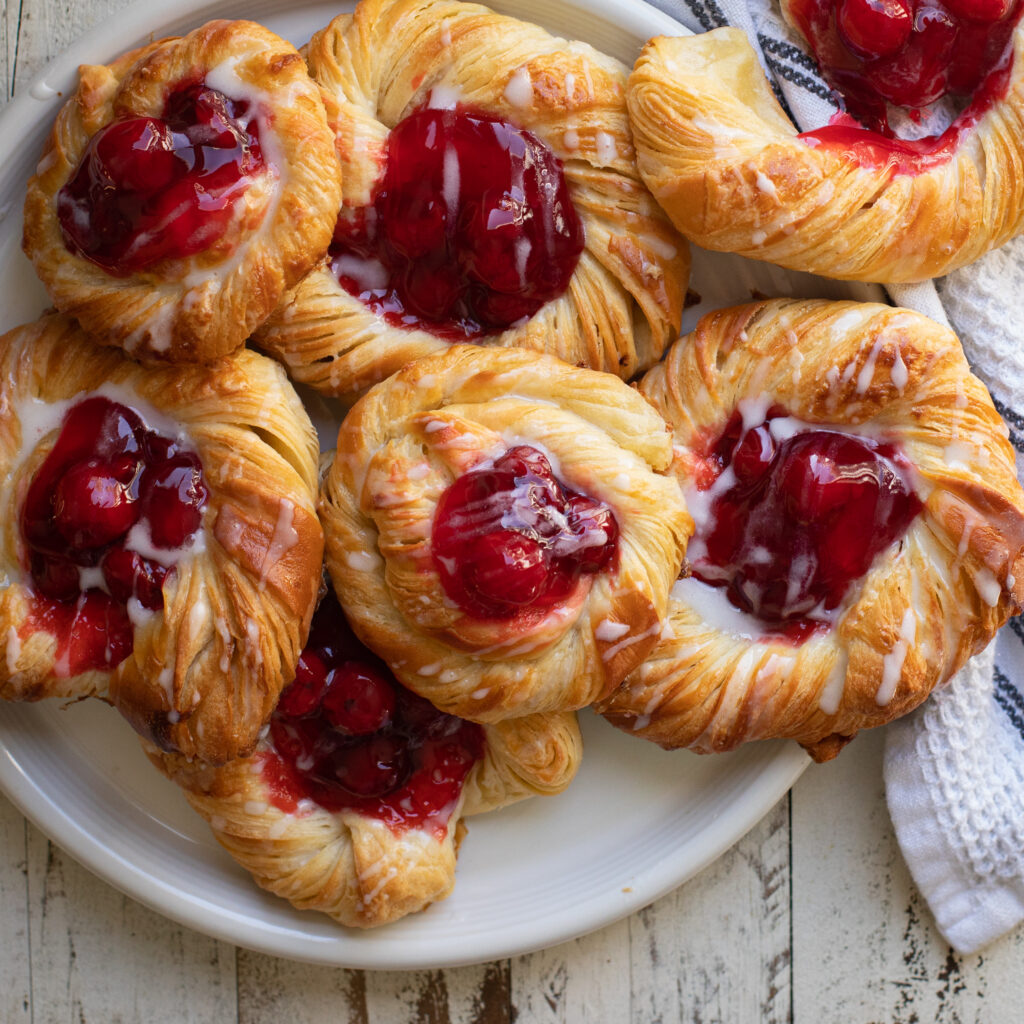
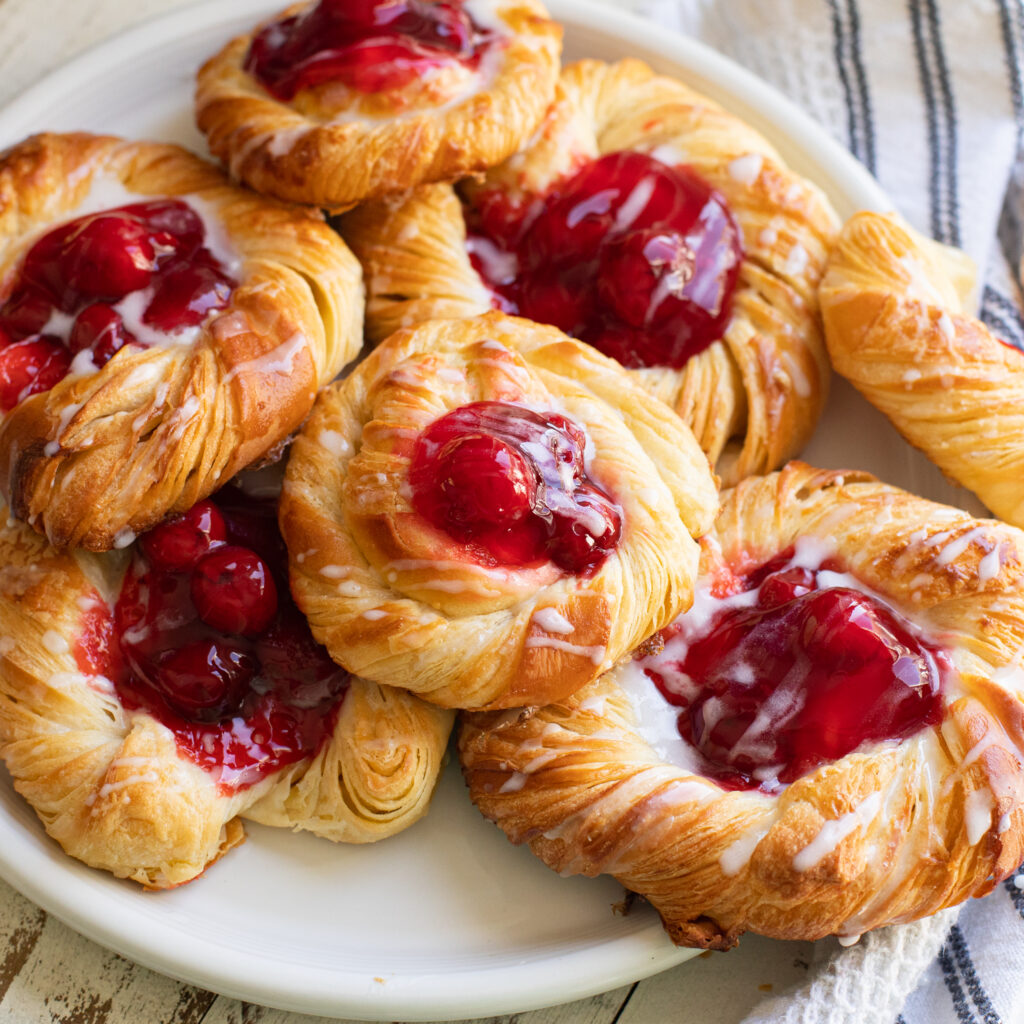
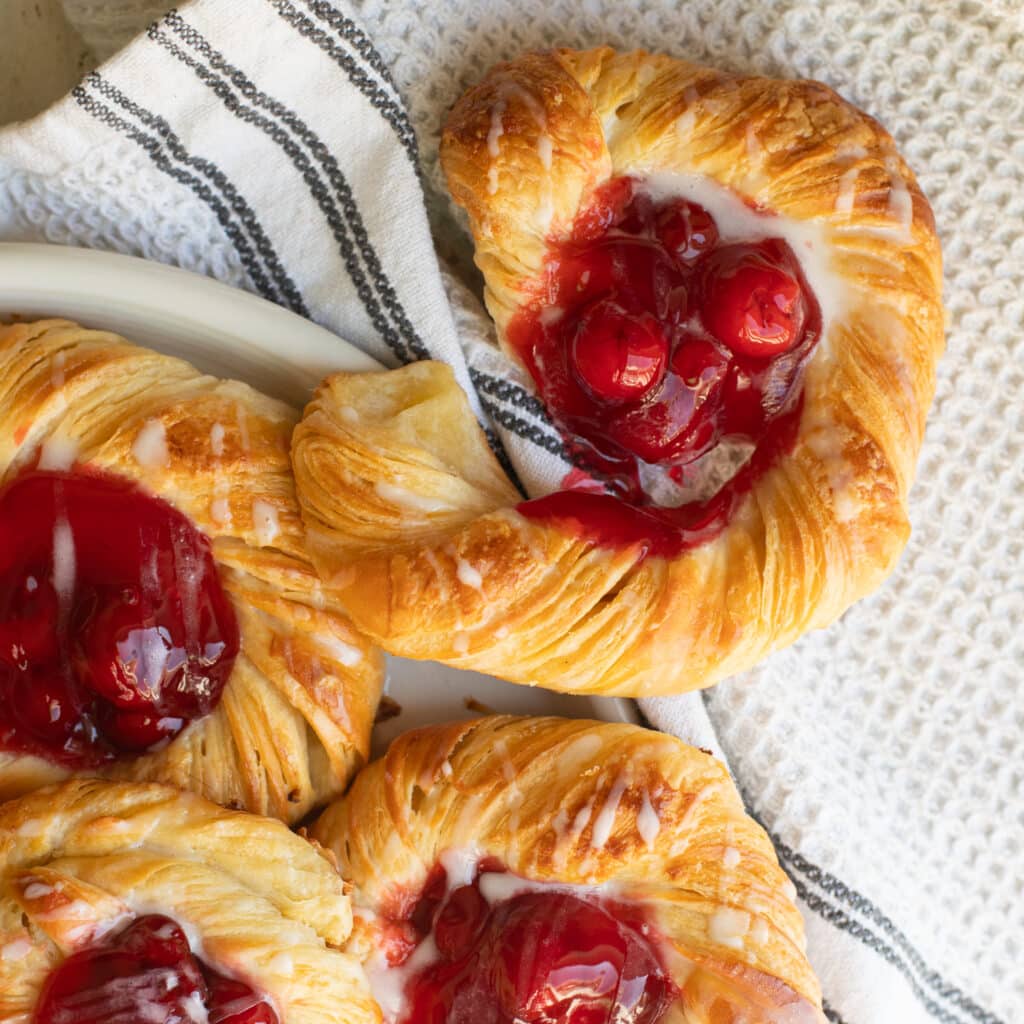
The buttery, flaky pastry is swirled in circles, then topped with sweet cherries and baked to golden brown perfection. It’s truly my favorite recipe of all the pastries.
Enjoy cherry danish on special occasions like Christmas morning and Valentine’s Day, or freeze them to reheat for an easy breakfast.
I’ll show you, step by step, how to create beautiful danish pastries that you’ll be proud to serve.
Ingredients for this Homemade Cherry Danish Recipe
Here is what you’ll need to make these homemade cherry danishes:
- All purpose flour
- Active dry yeast
- Salted butter
- Cherry pie filling. No need for fresh cherries, an easy cherry pie filling is the right answer.
- Milk
- Eggs
- Sugar
- Salt
Video Tutorial for Making Danish Pastry
What is danish pastry?
The type of dough used to make danish is the same dough that’s used for croissants and puff pastry sheets. It’s called laminated dough (also known as croissant dough and traditional danish dough).
Lamination is the process of layering cold butter into dough by rolling and folding it over and over. This folding process creates lots of flaky layers of dough.
You can then form the buttery puff pastry into croissants, crescent rolls or, in our case, pretty swirls of sweet pastry.
How to make this danish pastry recipe
I’m going to show you the traditional method of laminating pastry dough!
If it’s your first time making laminated dough, just follow these step-by-step instructions and you’ll have the most buttery, flaky danish you’ve ever had.
Day One – Make the Danish Dough
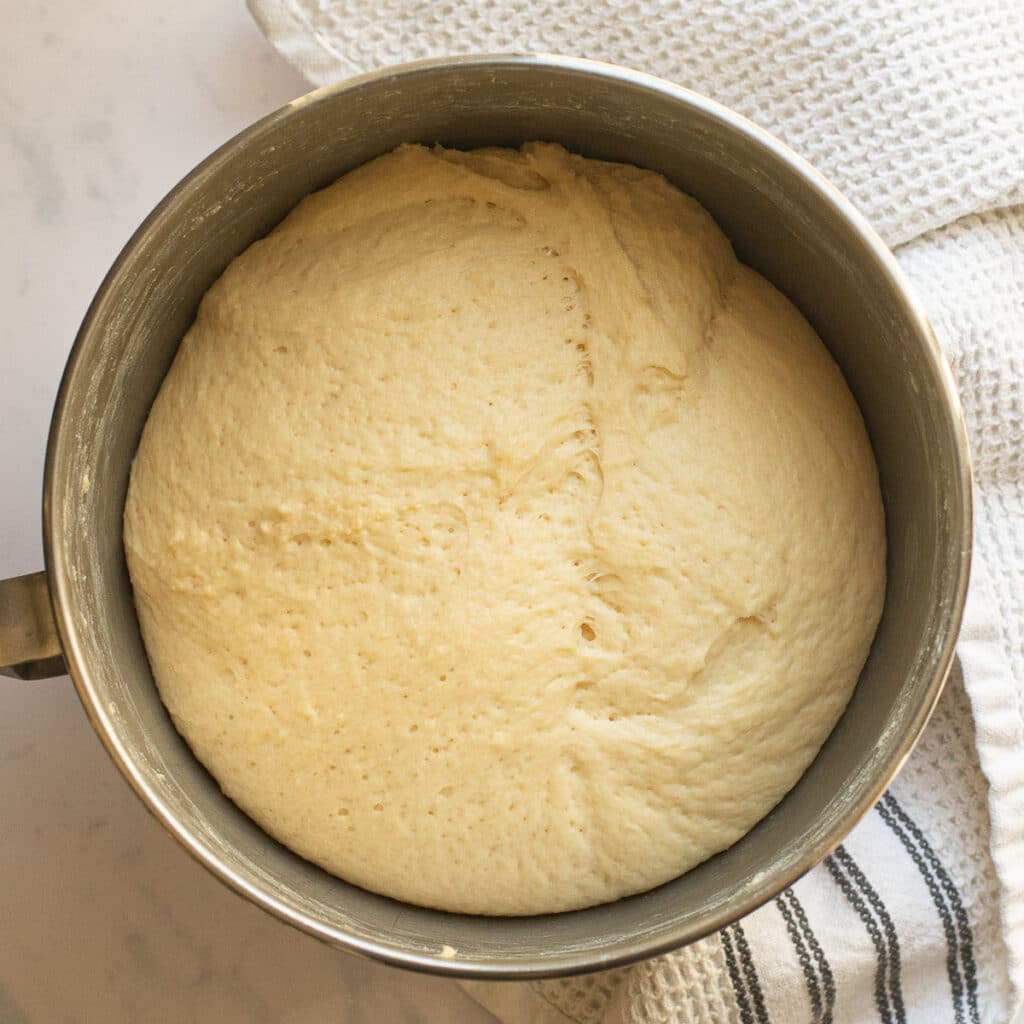
Make the Dough
Today, you’ll make the actual dough. This won’t take long at all.
Just combine the flour, salt, sugar, yeast, eggs, milk and butter to form the dough.
The best way to do this is to sift the dry ingredients together in a large bowl and then gradually add the wet ingredients.
Cover the dough and let it rise for a few hours.
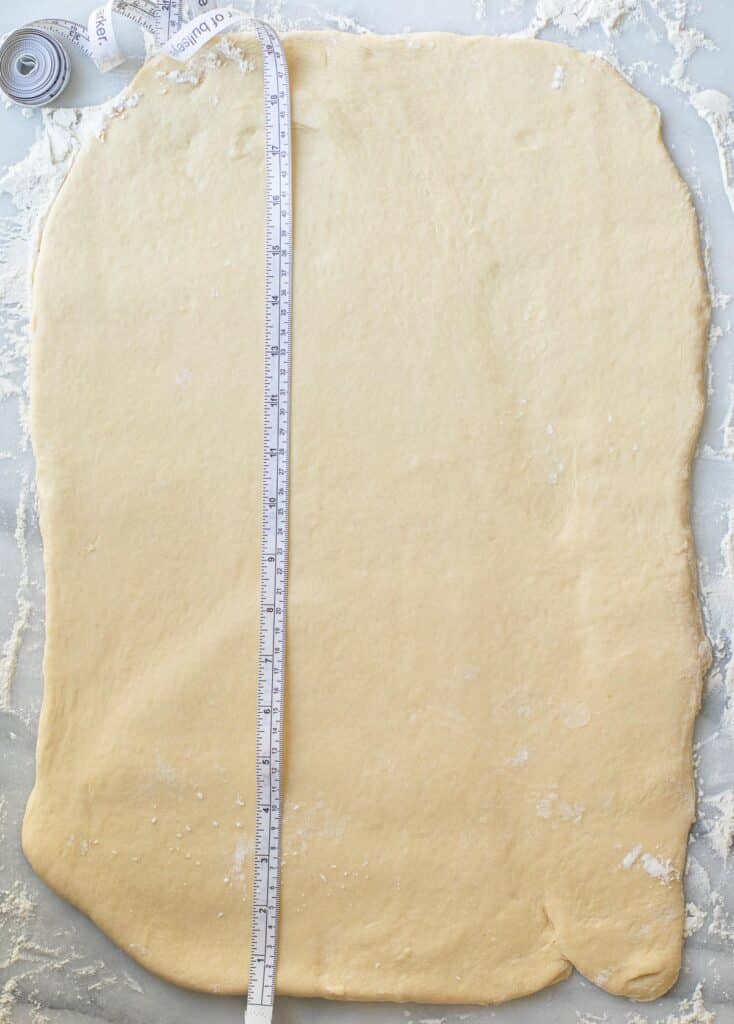
Roll Out the Dough
Once the dough has doubled in size, we’ll roll it out into a rectangular shape on a lightly floured surface.
Then, refrigerate the dough overnight.
Day Two
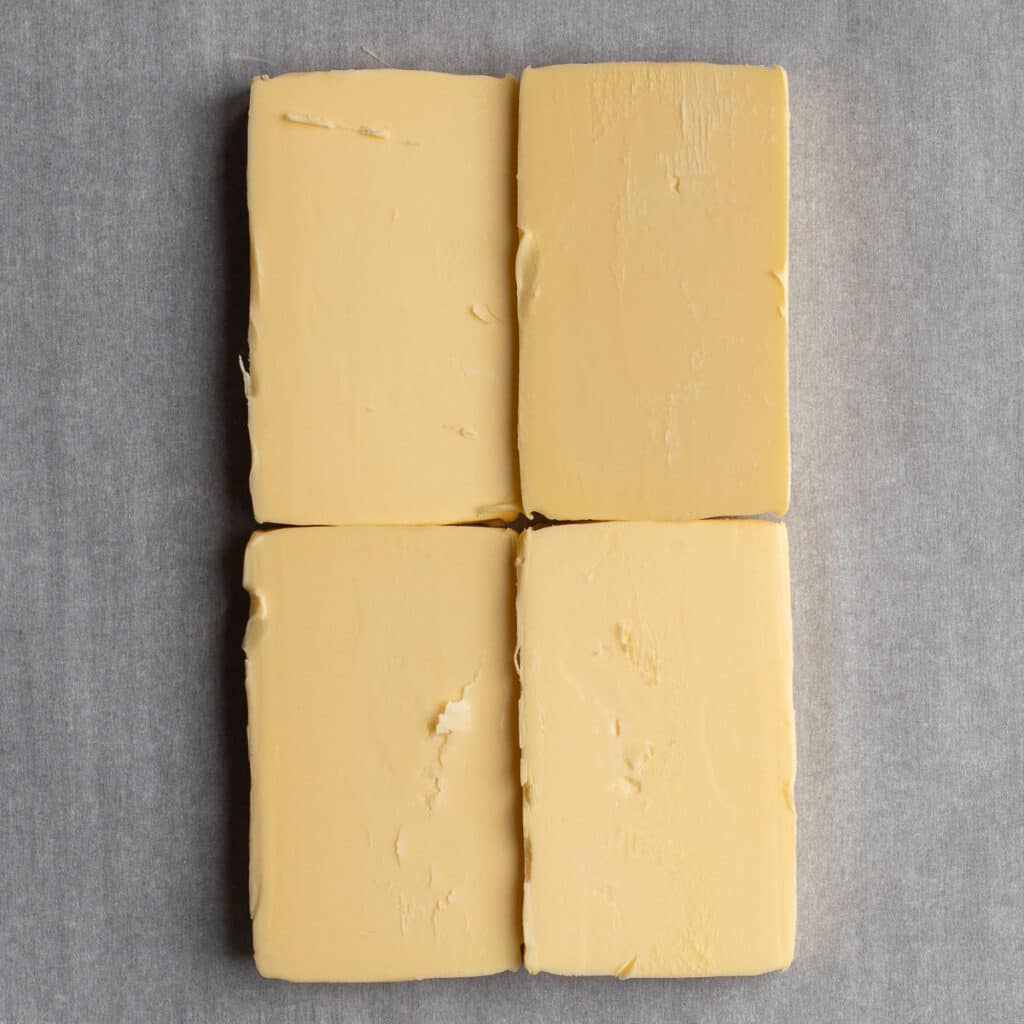
Roll out the Butter Block
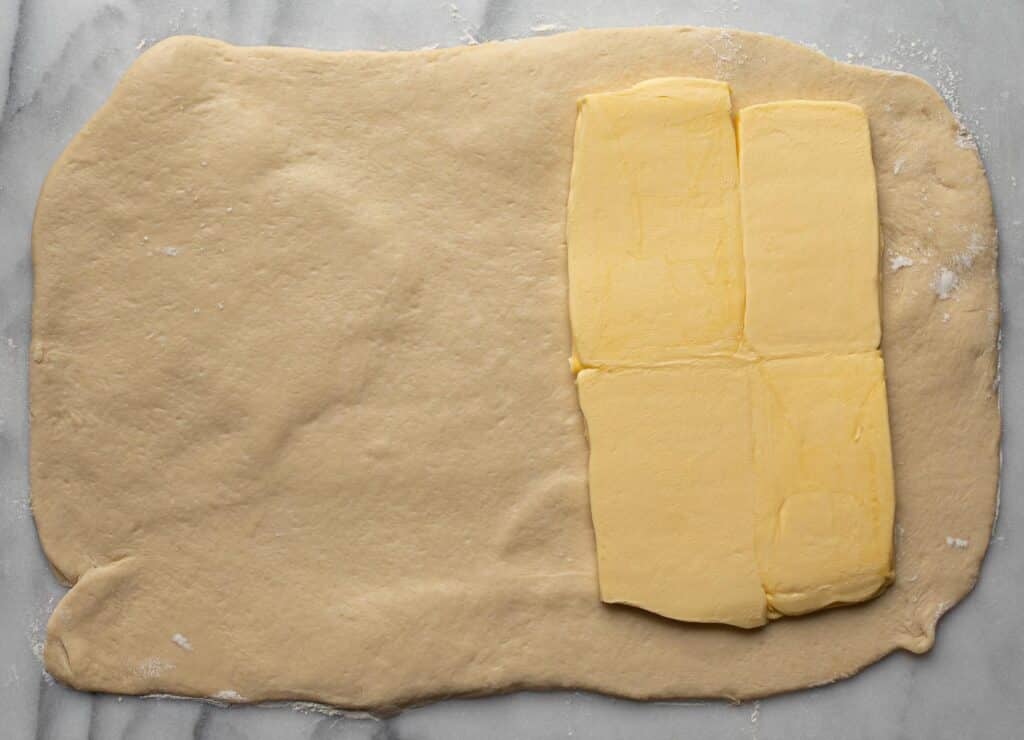
Place the cold butter in between two pieces of parchment and roll it out until it’s half the size of the dough.
It helps to slice the butter block crosswise so that you’re starting with thinner pieces.
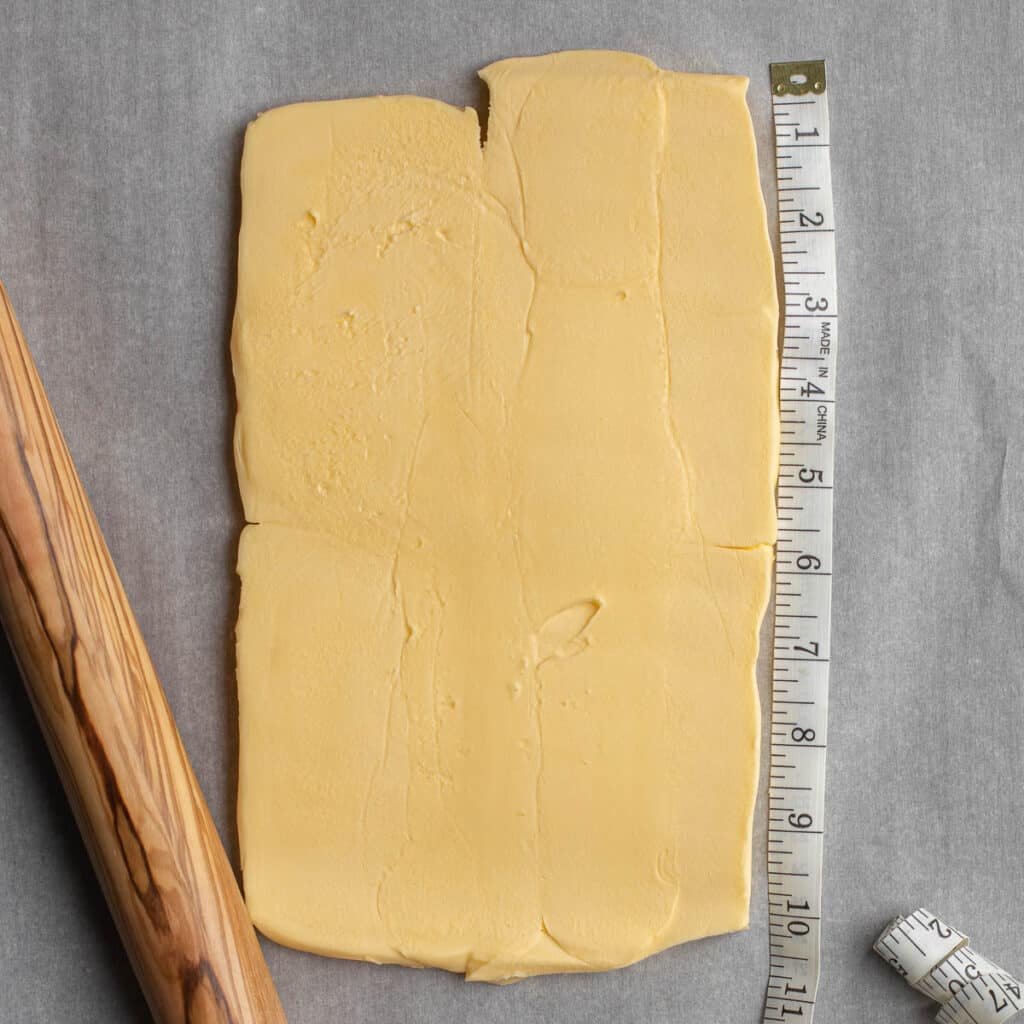
Rolling out the cold butter is the hardest part. It’s more about tamping the butter down with the rolling pin, then rolling a few times, then tamping down again. You might break a sweat. I always do!
Just get that butter slab to measure 10×6″ and you’re good.
The rest is just more rolling, folding, and chilling the folded-over dough.
Step by Step Photos
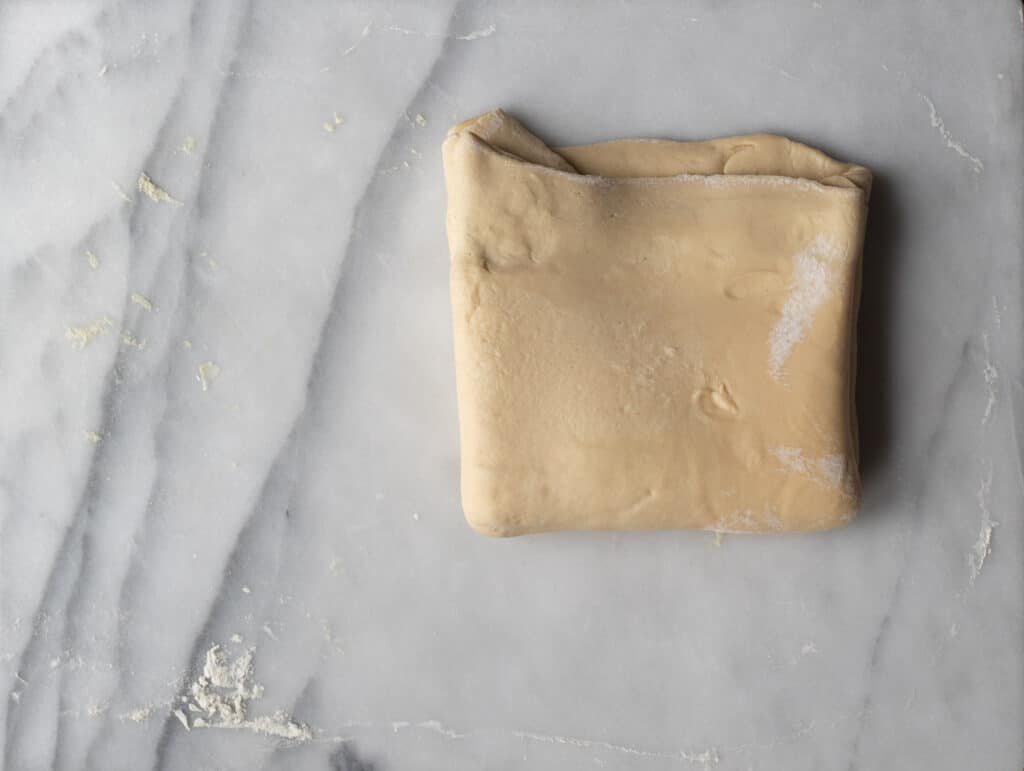
Place the butter onto half of the dough.
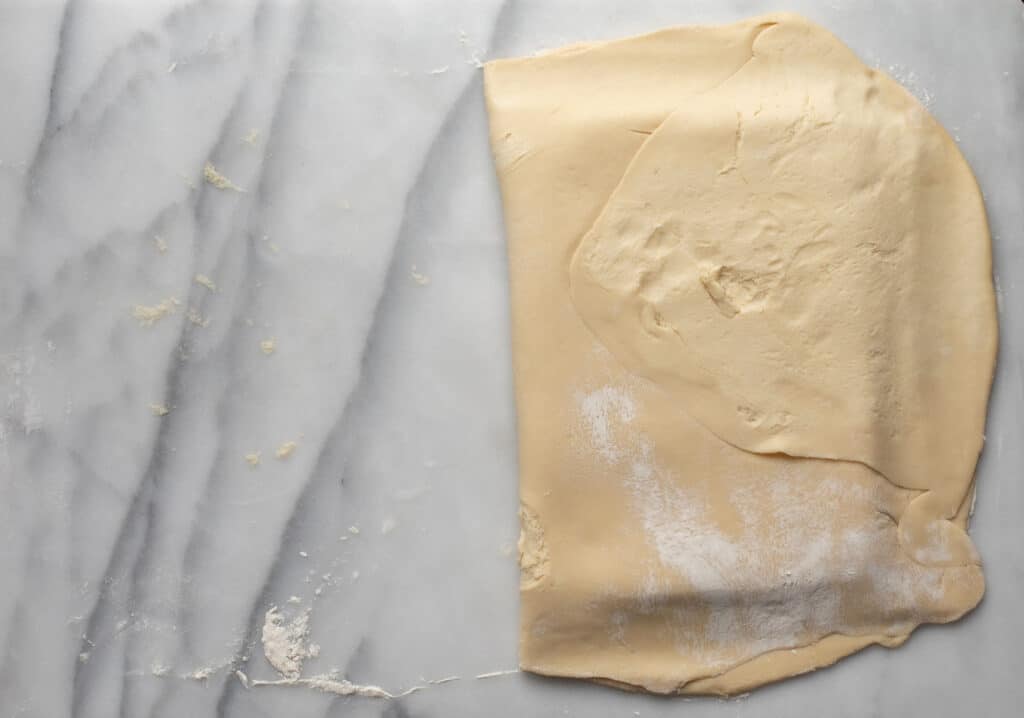
Fold the other half over the butter.
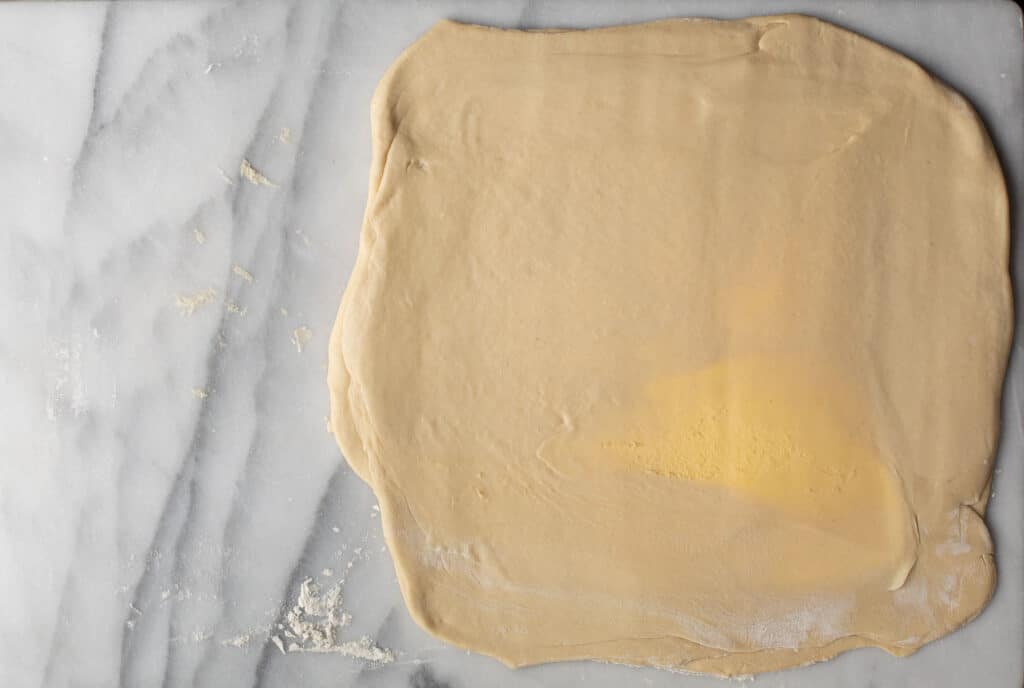
Roll it out again.
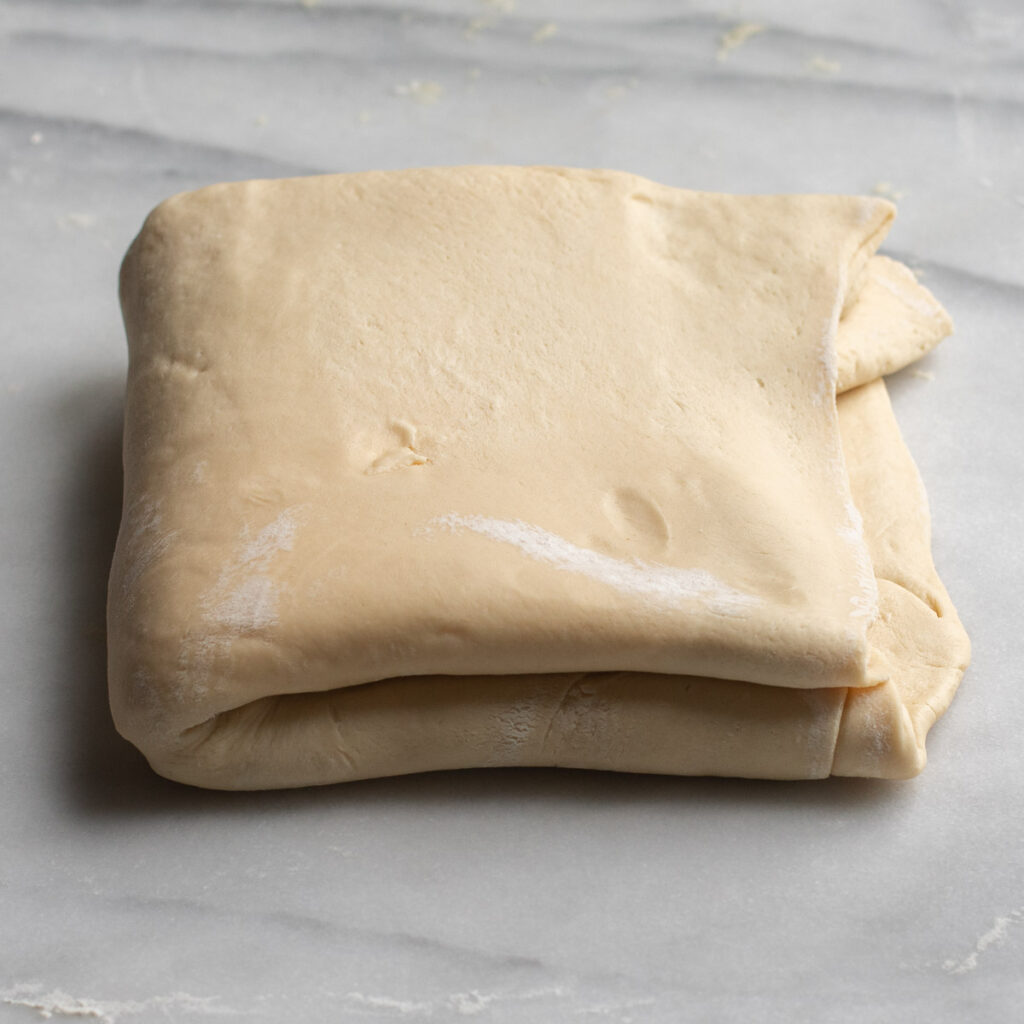
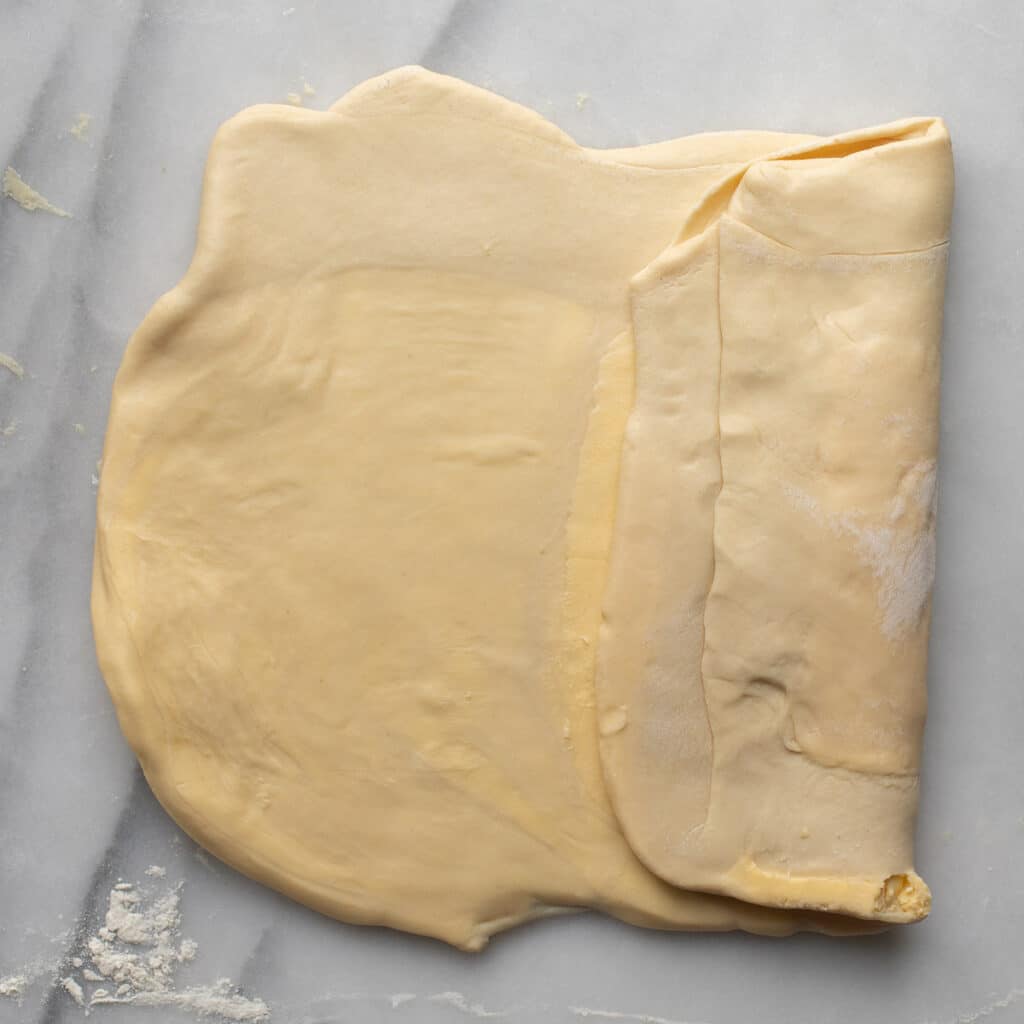
Then, rotate the dough 90 degrees. Fold the 2 short ends into the center so that they meet each other.
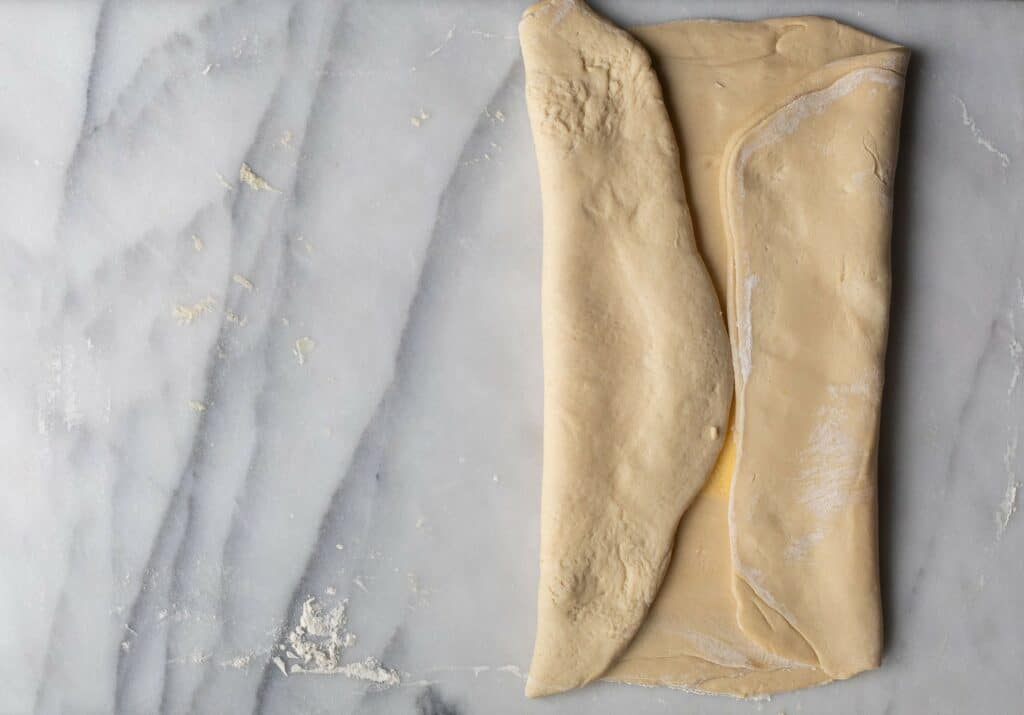
Now, fold one half over the other, like you’re closing a book.
Chill the dough.
Bring the dough back out of the fridge and roll it out again.
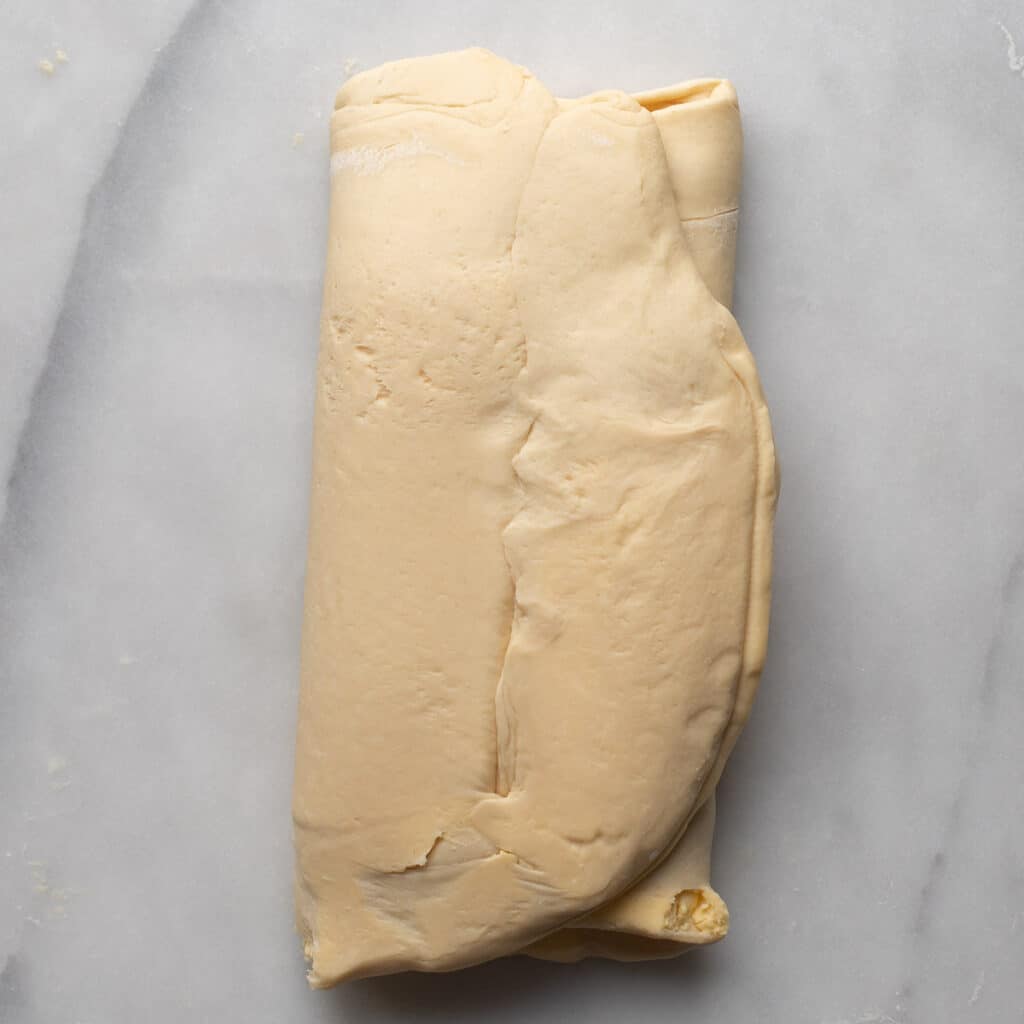
Now, fold the rectangle into thirds: fold one short end 1/3 of the way in…
… and fold the other short end over it.
Chill the dough.
Bring the dough out again, roll it out and do the 1/3 folding one more time. Chill the dough.
After the final refrigeration, you’re ready to work with the dough!
Forming the pastry dough into Danish shapes
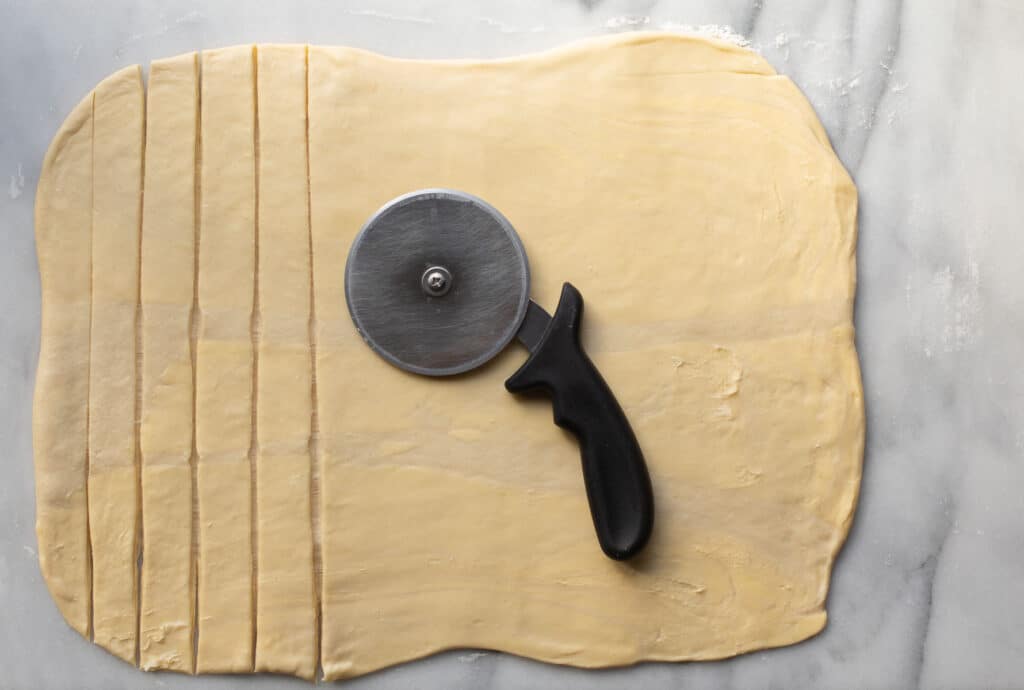
Twisting the Dough Strips
Roll the homemade puff pastry back out into a rectangle and slice 1″ thick strips from long end to long end.
Twist the dough strips…
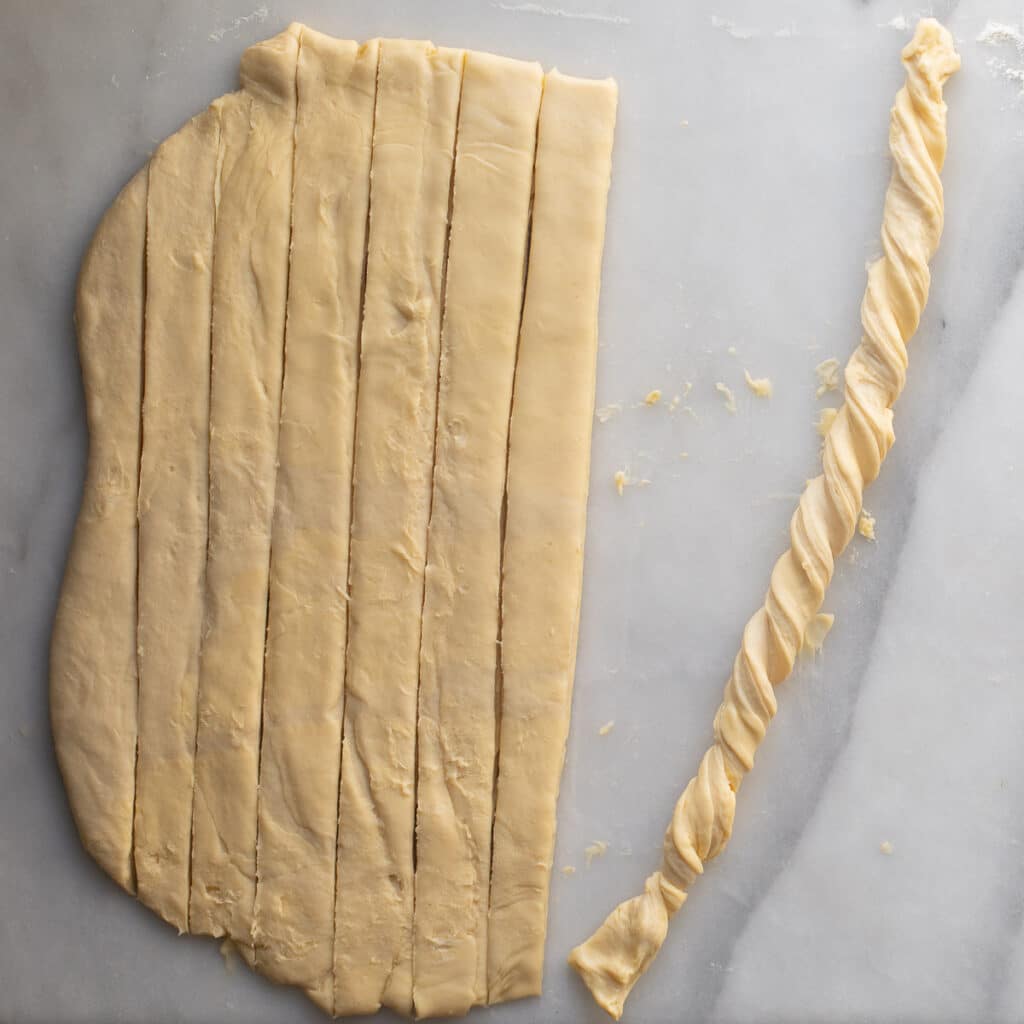
… and then form the strips into circles.
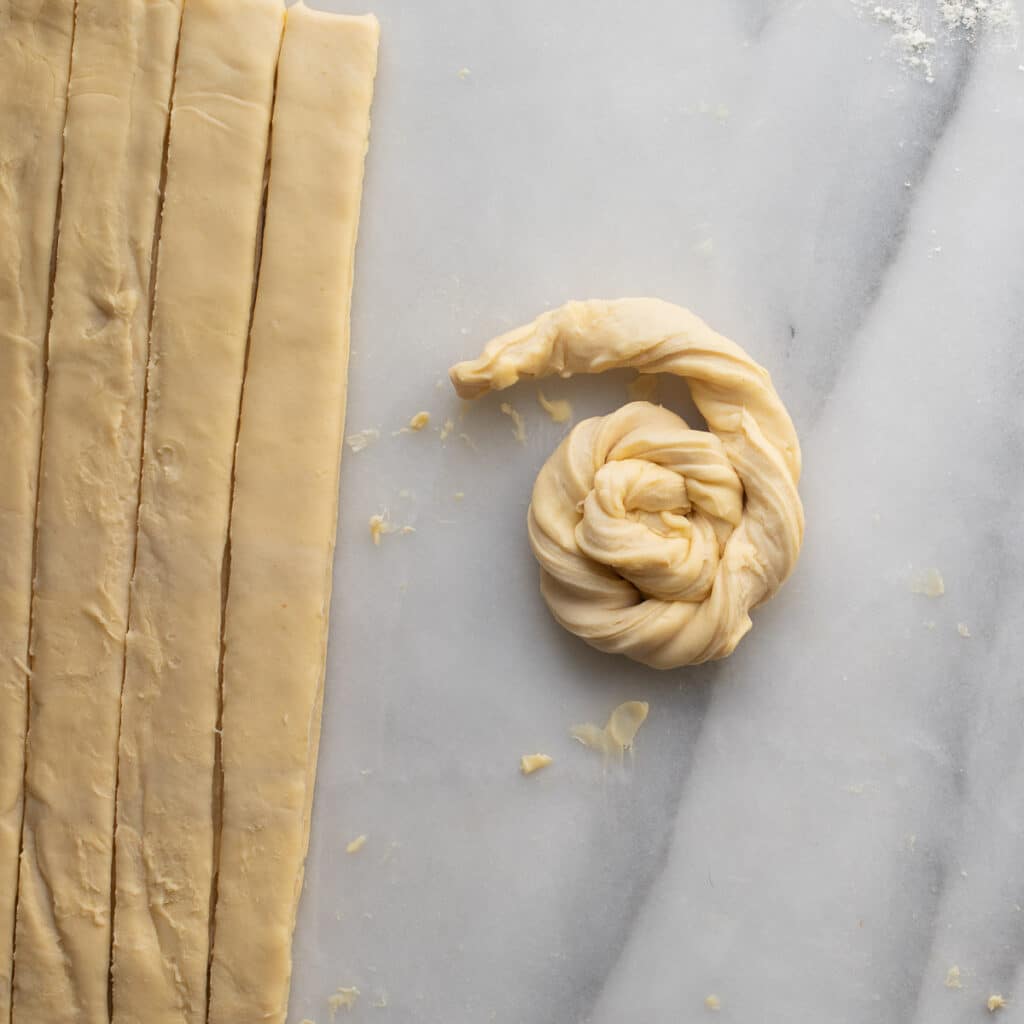
Let the dough rise a second time on the counter top. Then, it’s time to fill our danishes.
Filling the danishes
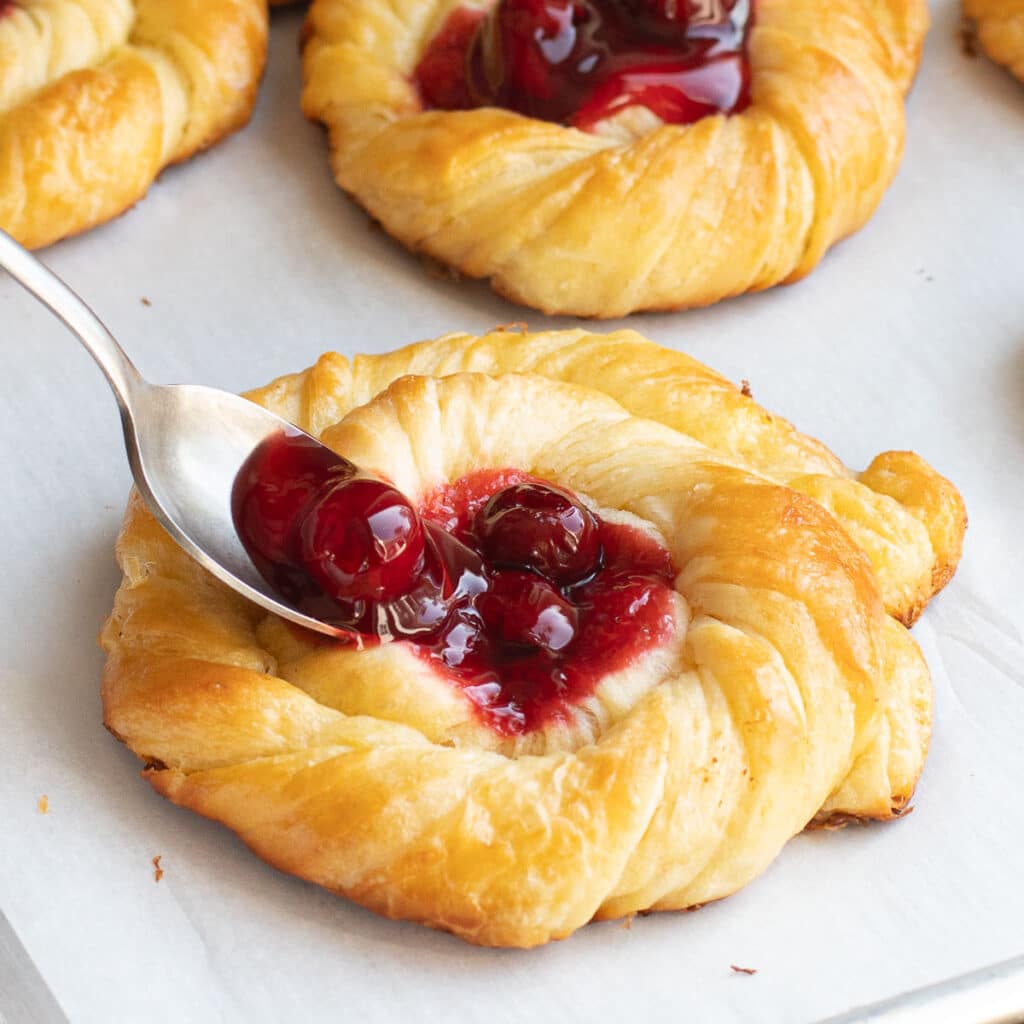
Now, form a very deep indentation in the center of each danish. I use my fingers to do this because I really want to press down as much as I can.
Then, place only 1-2 cherries in the center of each danish. You’ll see that a little goes a long way when it comes to the cherry filling.
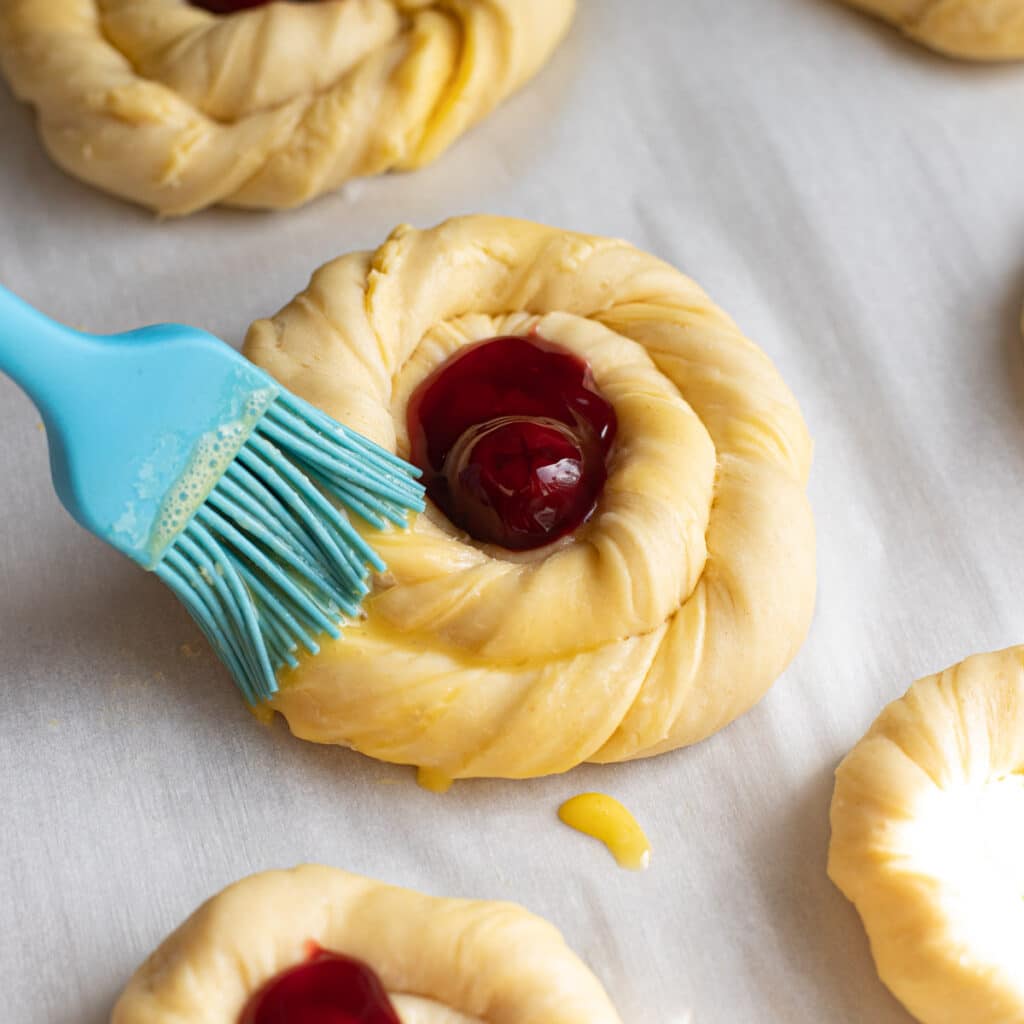
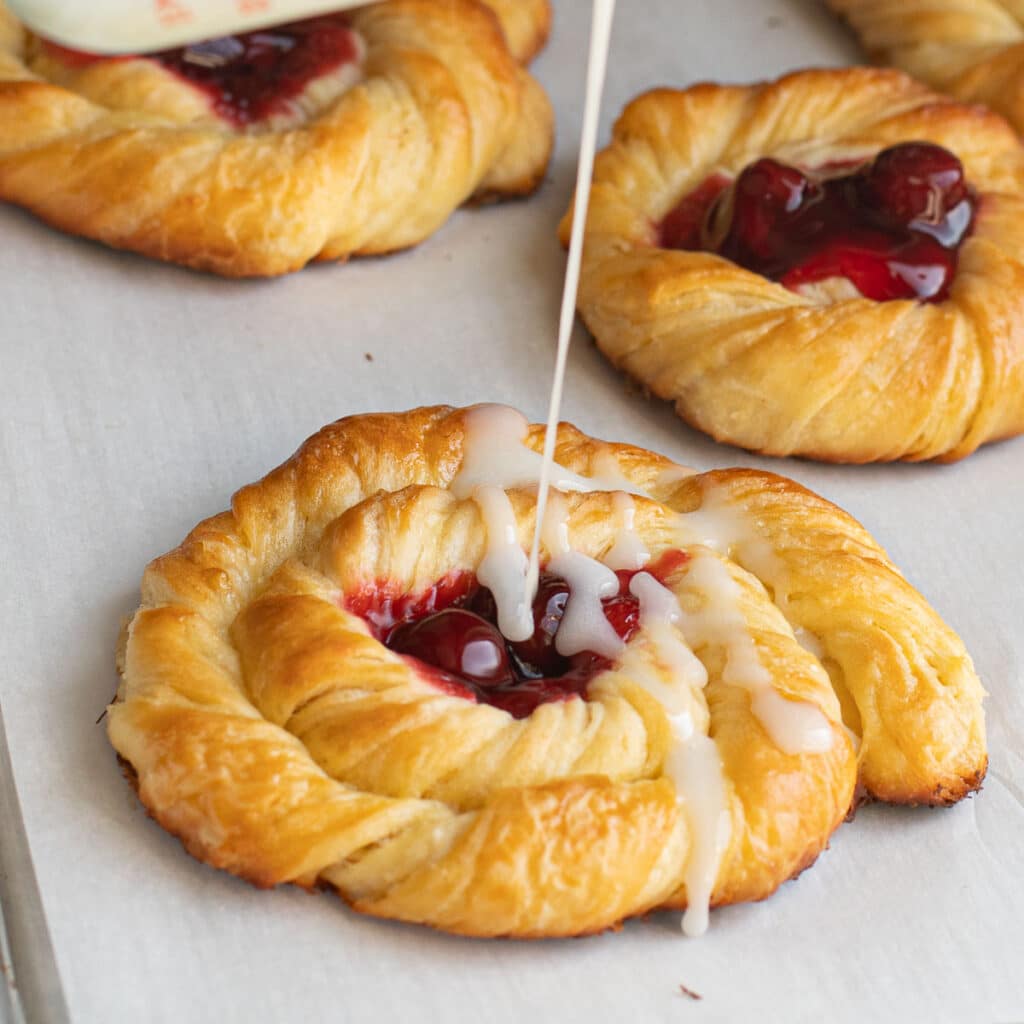
Brush the top of the dough with egg wash and bake until the buttery pastry is puffed and golden.
Once they have cooled, drizzle them with the sugar glaze.
Tips for Success
- Do not overfill. When making fruit filled pastries, a little bit of fruit goes a long way. So, after you form the danish shapes, make sure to create a very deep well in the center. I’m talking, as deep as possible without actually putting a hole in the dough. Then, fill the center with no more than one or two cherries. If your fruit filling does seep out onto the pastry during baking, don’t fret! Just add a few more cherries after baking to cover up any mishaps that may have occurred in the oven. No harm done.
- Use a food scale to measure out the ingredients. It’s a good thing to have for baking, and very important in this recipe.
- Use Irish butter instead of regular butter. It has a higher fat content that is necessary to get those super flaky layers.
- Thin out the butter blocks. When you’re ready to roll out the butter, slice the butter pieces crosswise to create two thinner rectangles. Line them up next to each other. This will make rolling easier.
- Use a portable work surface. You’re going to be moving the dough in and out of the refrigerator quite a few times during the preparation process. I like to use a large cutting board to roll out the dough. Then, I cover the entire board with plastic wrap and refrigerate it. This way, I’m moving the dough right on its work surface in and out of the fridge without having to wrap it individually each time. If you have a large cutting board, I’d recommend using it as a portable work surface.
- Keep it cool. Try to move as efficiently as you can through the steps and get the dough back into the fridge. The idea is to keep the butter cold. If the butter starts to melt and it gets difficult to roll out the dough, pop it into the refrigerator for 20 minutes. Take it back out and resume the step you were working on.
Can you freeze Danish pastry?
You can freeze danish pastry both before and after it is baked.
Before baking: Form the danish dough into the desired shapes and arrange them on a baking tray. Freeze until firm, about 30 minutes. Then, wrap the unbaked danish pastries individually in plastic wrap.
Place the danishes into an airtight container or heavy-duty freezer bag for storage. When ready to bake, defrost the pastry at room temperature and follow the baking instructions below.
After baking: Wrap each danish individually in plastic wrap, followed by a plastic bag or airtight container. Defrost at room temperature. You’ll love being able to pop out an individual breakfast pastry on a weekend morning as a special treat!
When you make this danish pastry recipe, I’d love to hear about it! Drop a rating or leave a comment below. Enjoy!
As an Amazon Influencer, I may earn commissions from qualifying purchases from Amazon.com.
For more sweet treats for breakfast, try these:
- Blueberry Lemon Muffins with Citrus Crumble
- Sticky Bun Monkey Bread
- Classic Cinnamon Rolls with Vanilla Frosting

Homemade Cherry Danish
Ingredients
- 600 grams all purpose flour
- 525 grams unsalted butter cold, divided
- 3/4 cup + 3 Tbsp. milk room temperature, divided
- 2 eggs room temperature
- 4 tsp. active dry yeast 2 packets
- 1 can cherry pie filling
- 12 grams salt
- 80 grams sugar
- 1 cup confectioner's sugar
- 1/2 cup water 110-115 degrees
Instructions
- Stir yeast into the warm water and let dissolve 10 minutes.
- In the bowl of a stand mixer fitted with the dough hook attachment, sift flour, salt and sugar. Stir the yeast mixture into the flour mixture.
- With the motor running on medium low, beat in 1 egg, 3/4 cup milk and 65g of butter. Beat about 4 minutes. Shape into a ball. Cover the bowl with a damp towel. Let rise until doubled, about 2 hours.
- Dump the dough out onto a lightly floured work surface. Using a floured rolling pin, roll dough into a rectangle approximately 19×11". Wrap in plastic wrap. Refrigerate overnight.
- Slice the remaining 460g blocks of butter crosswise so that they are thinner rectangles. Place them next to each other between two pieces of parchment. Roll them out until they are about half the size of the dough rectangle, approximately 10×6". Place the butter on top of half of the dough. Fold the remaining dough over the butter. Seal the edges with a rolling pin.
- Turn the dough 90 degrees. Roll into a rectangle approximately 1/2" thick. Fold the two short ends of the dough into the center so that they meet each other. Then, fold one over the other, like you're closing a book. Wrap in plastic wrap and chill for 30 minutes.
- Roll the dough out again into a rectangle 1/2" thick. Fold into thirds: fold one short end 1/3 of the way, then fold the other end over the first end. Wrap and chill for 30 minutes.
- Roll out again and repeat step 7. Wrap and chill 30 minutes.
- Line a baking sheet with parchment paper. Roll the dough into a rectangle about 18" long. Using a pizza cutter or sharp knife, slice strips from long end to long end that are about 1" wide. Place them onto the prepared baking sheet. Holding opposite ends of the dough strips, twist them and then wrap them into circles. Tuck the edges in. Cover and let rest 90 minutes at room temperature.
- Preheat oven to 375 degrees. Using the back of a spoon, make deep wells in the center of the pastry circles. Fill the wells with 1-2 cherries. Beat the remaining egg together with 1 Tbsp. cold water. Use a pastry brush to brush the pastries with the egg wash. Bake 30 minutes. Cool for 5 minutes on the sheet pan before transferring to a cooling rack.
- To make the glaze, whisk the confectioner's sugar with 3 Tbsp. milk in a small bowl. Drizzle over cooled danish.
These are incredible! Turned out perfectly and my family loves them!
Hi Christy,
So happy that you and your family enjoyed the danish! Thanks so much for your feedback! 🙂
How do you turn measurements into cups and ounces?
Hi Roz,
For recipes like this, I strongly encourage the use of a food scale so that you can accurately measure the grams. If you do not have a food scale, here are some general equivalents that may help:
1 cup flour = 120 grams
1 cup sugar = 200 grams
1 cup salt = 273 grams
1 cup butter = 227 grams
Hope this helps! 🙂
OMG…..best Danish ever!!!!! I have never attempted it before but your post was so informative that I had to do it. I did not have the large board but will definitely invest in one. I have to say that the pics gave me great reference along the way too. Many, many thanks for sharing with the world!!
Hi Barb,
Yay! I’m so glad you loved the recipe, it’s definitely a process! Thank you so much for taking the time to provide your feedback, it means a lot to me 🙂
I used active dry yeast the first time I made these and I wonder if instant dry yeast can be used instead?
I haven’t tested this recipe using instant yeast so I can’t predict the results!
Made my life a bit easier, whipped the butter, rolled it into a 6×10″ square between 2 pieces of waxed paper, put it in the freezer for a while. Use this technique for croissants as well. Love these danish.
Pat, you’re a genius!! That’s a great hack!
These were the best! I ended up making a double glaze. For the first batch I mixed in a little of the cherry syrup with the sugar and milk, then followed your recipe for the second glaze! They turned out beautifully!
Hi Ria,
I’m so glad they came out nicely and that you loved the recipe! Thanks so much for sharing your feedback 🙂